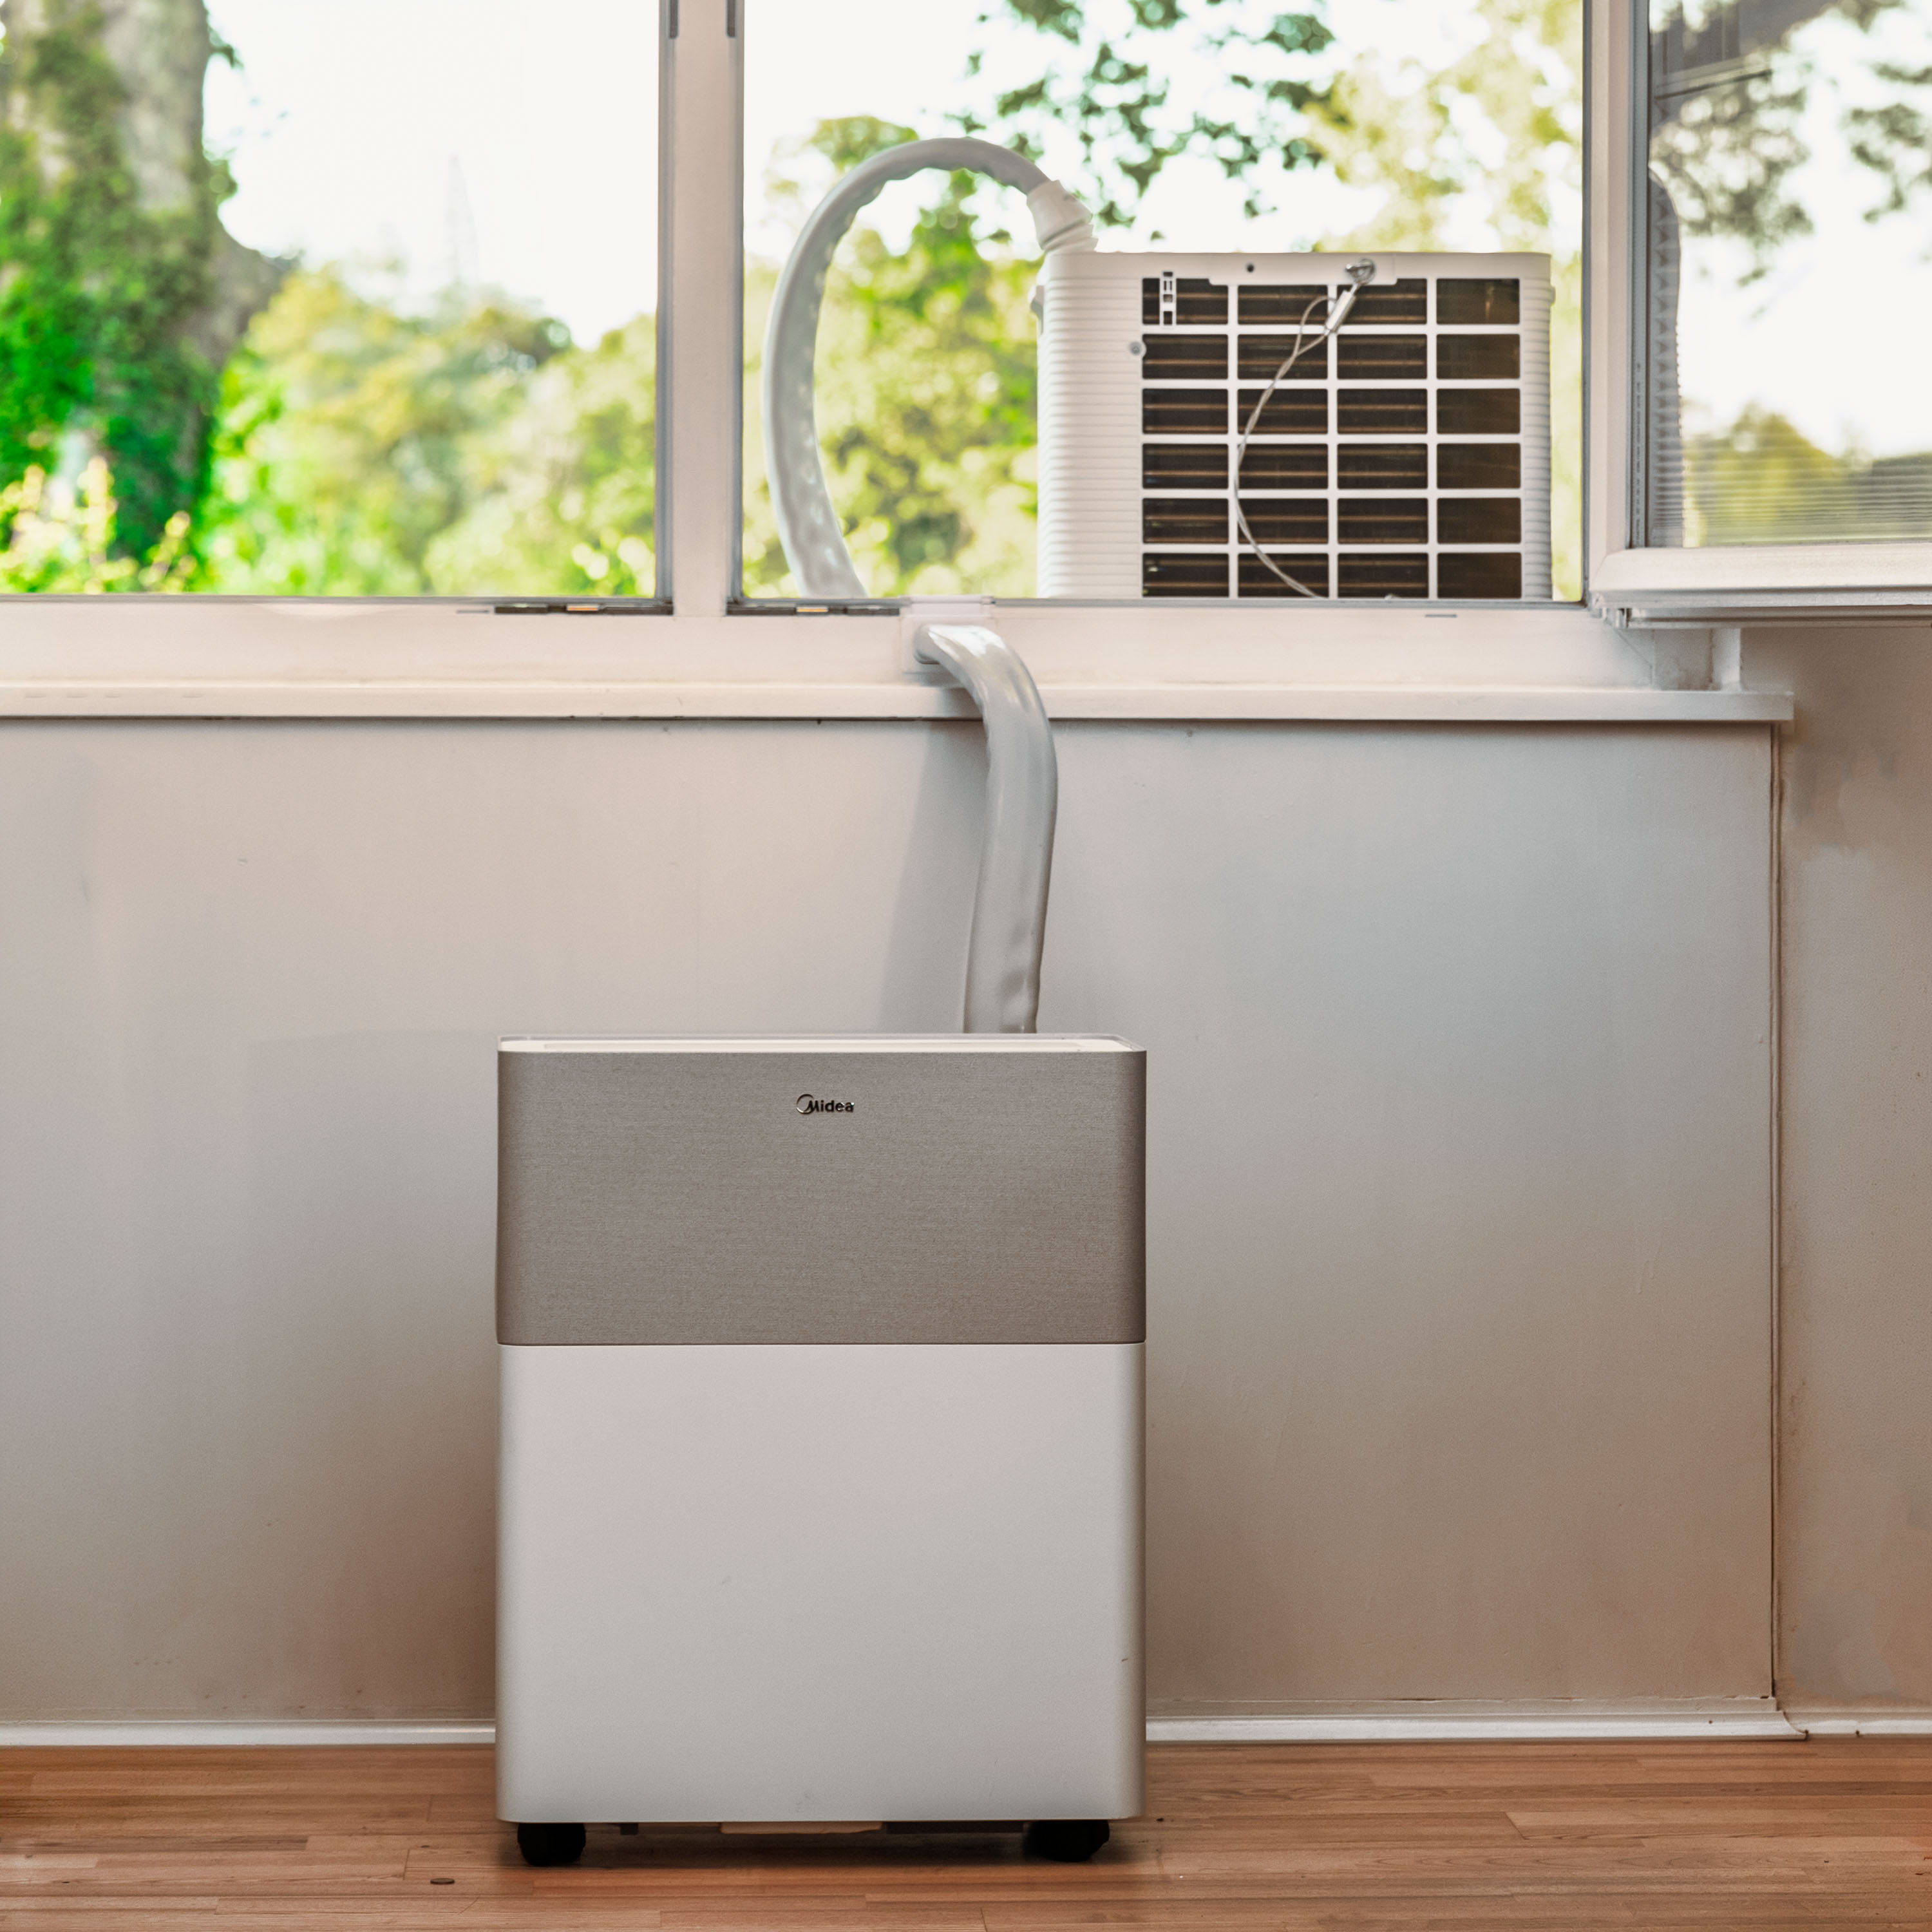
The plan originally seemed simple enough: open the window, run the hose bundle through, done. That works. For a week. Maybe two. But I did not want to leave a window facing the street permanently open — and after a few days, the daily back-and-forth of feeding everything through became annoying enough that I started thinking about something different.
What makes the Midea PortaSplit interesting is that it combines the idea of a split AC with the setup and teardown flexibility of a regular portable unit. Outdoor unit outside, no thick exhaust hose eating back into your cooling efficiency — that actually makes a difference. The catch: the indoor and outdoor units cannot be separated, the refrigerant line is permanently connected. A simple core drill through the wall is not really an option either — or the hole would have to be as large as the outdoor unit itself. A window pass-through is actually ideal here: one larger opening to get the outdoor unit outside, and then just the pass-through in the window frame once everything is closed.
Why I ended up cutting into the window at all
On my window, the improvised option stopped being a real option pretty fast. The window faces the street. Outside noise is a real factor, and leaving a ground-floor window open towards the street just does not feel right. Those common fabric or Velcro solutions for portable ACs only half-solve the problem — the window still ends up as a summer-only workaround, the kind you look at every evening and think: well, good enough I guess. I wanted something that stays installed, looks clean, and still lets the window close normally.
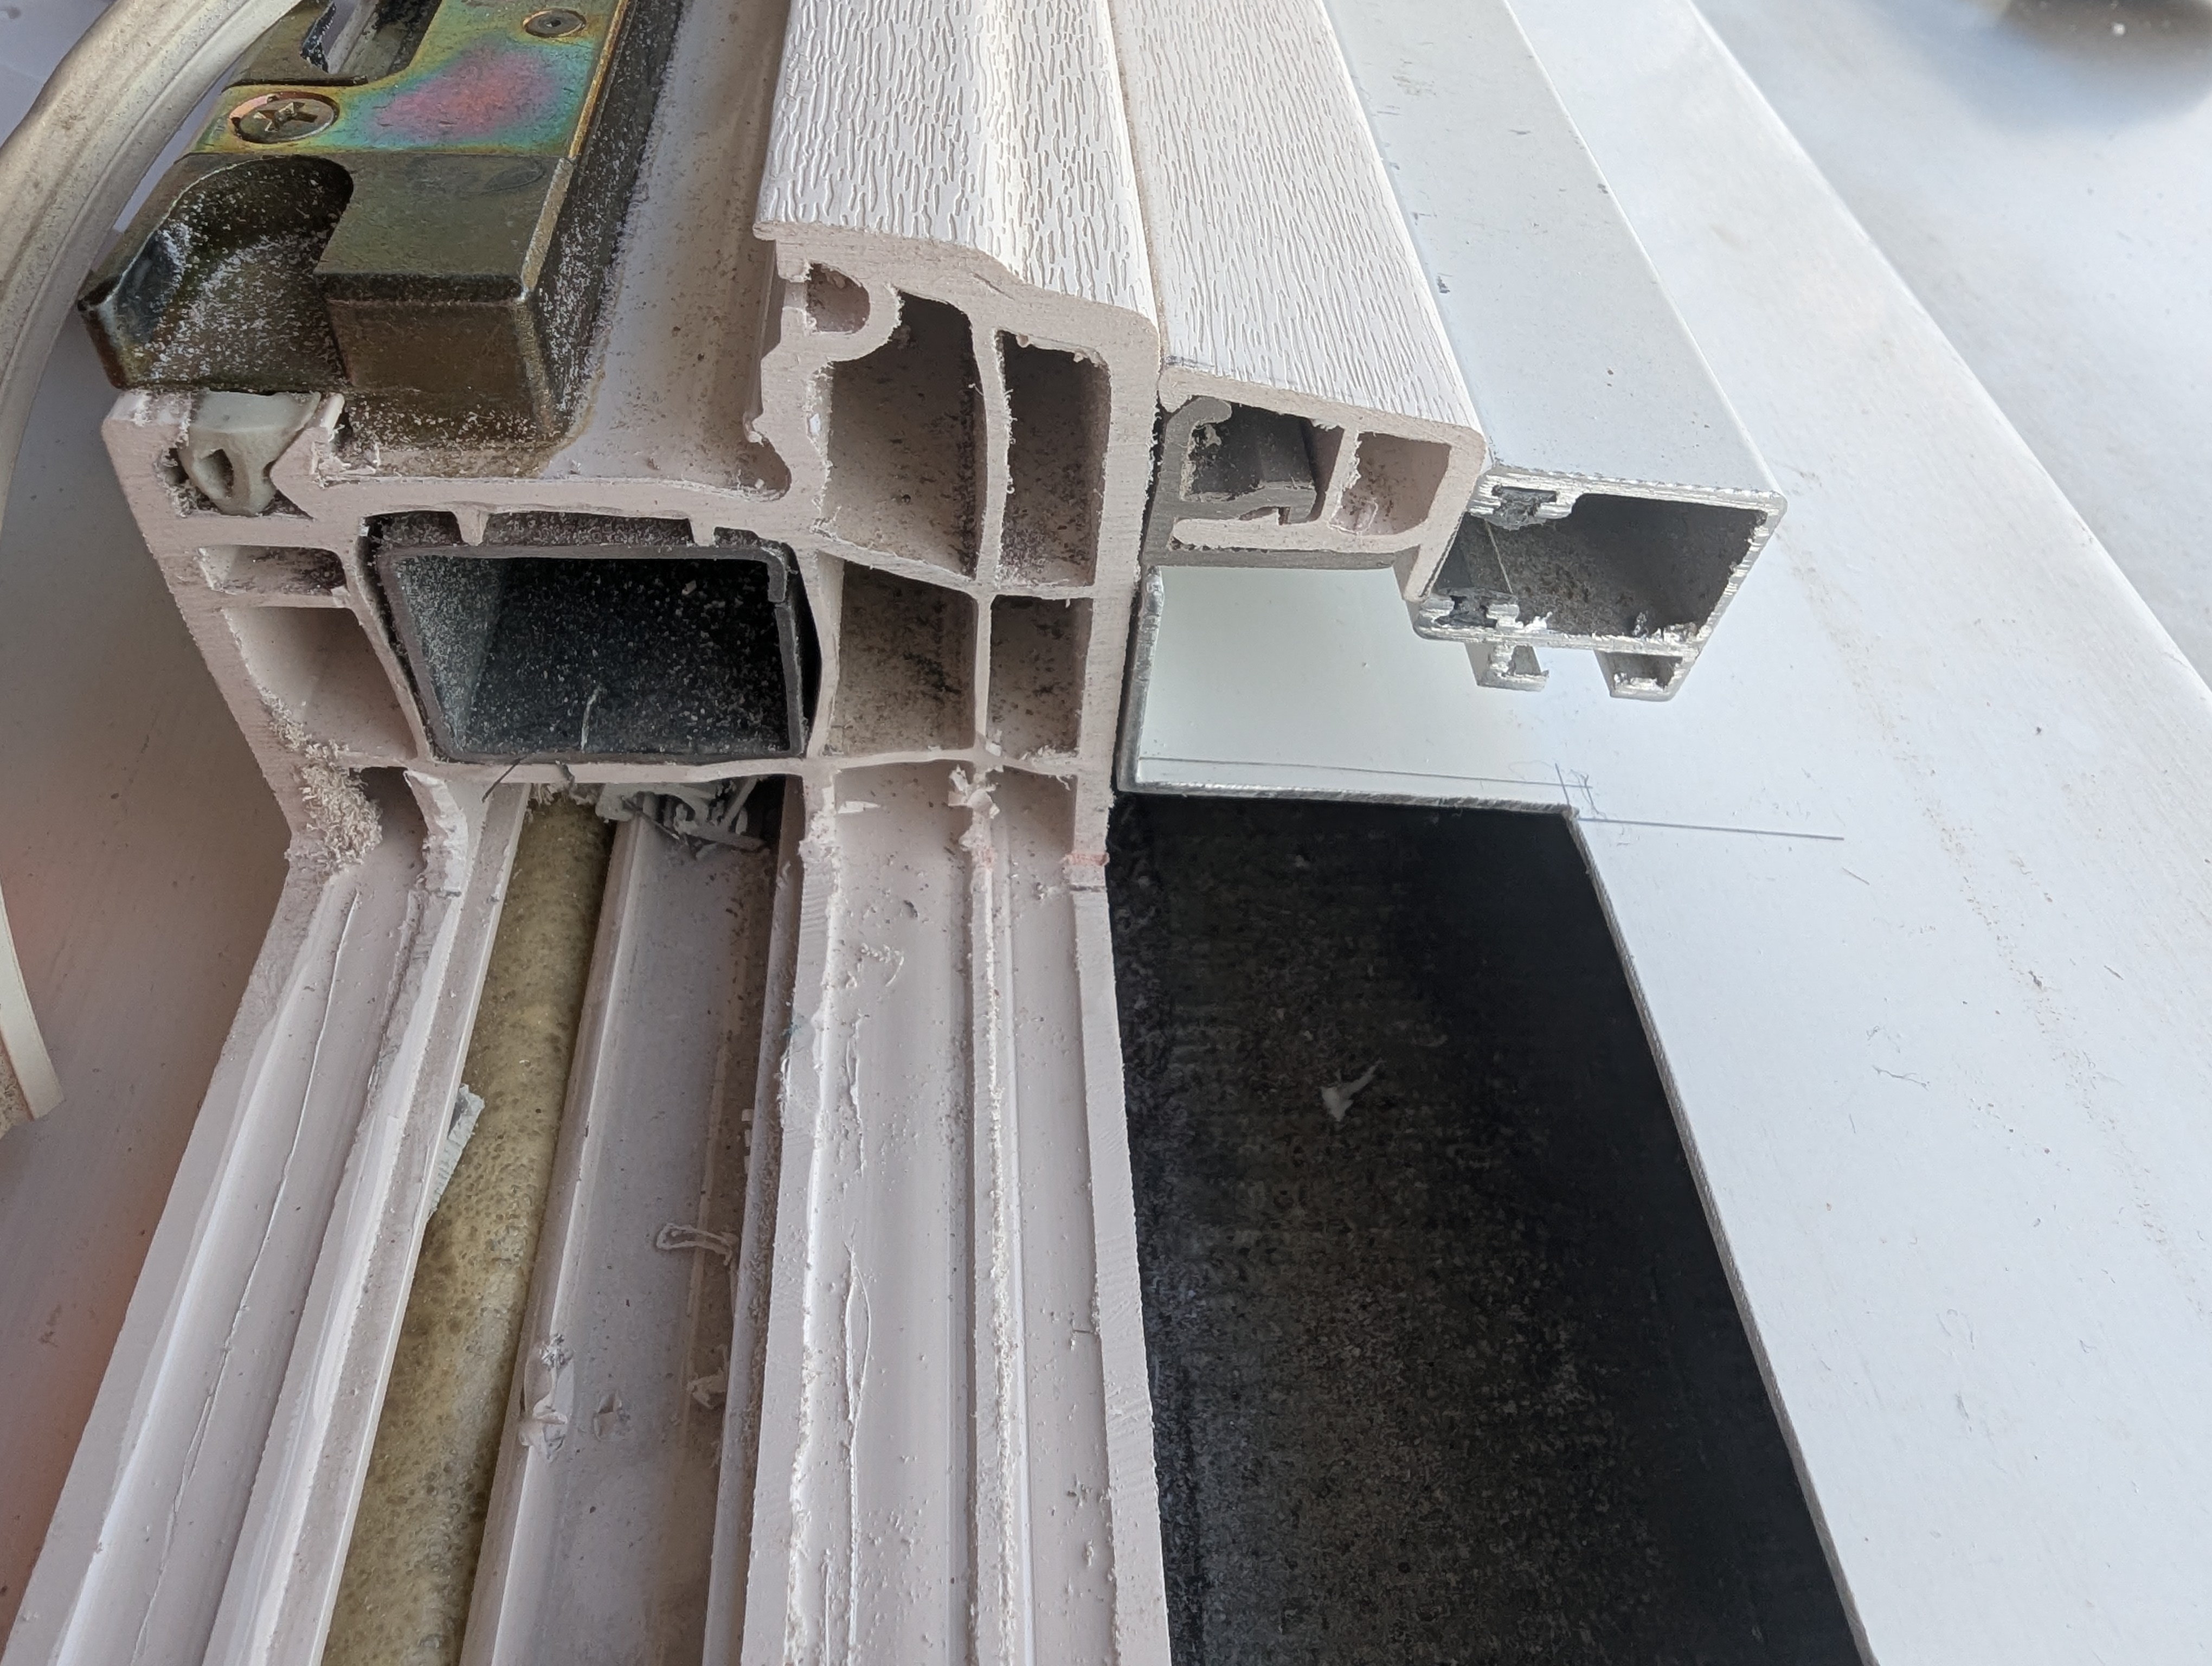
That meant, in the end, a cutout in the inner frame — roughly 8 cm wide and 5 cm deep on my window. So not a delicate little slot, but a real cutout. Not all the way through the entire window frame, just far enough that the hose bundle can be fed through cleanly. Still a real intervention, and I do not want to understate that.
For the actual cuts I used a hand metal saw for the vertical ones and a multitool with a saw blade for the horizontal ones. The multitool was the more important tool here: the horizontal cut sits right at the frame stop, where a regular saw barely has room to work. With the multitool, you can get in there. The actual challenge was not the tools but being as precise as possible — not because it is technically difficult, but because you really do not want to have to patch things up afterwards. Honestly, it was mostly a matter of hoping it would turn out fine.
Your window, your call
Straight talk on liability: build at your own risk
This is a personal maker project, not a universal building guide.
Anyone copying something like this may be modifying a window frame. That can affect sealing, structural behavior, warranty, rental agreements, moisture behavior, or break-in resistance. I cannot judge whether the same approach makes sense, or is even acceptable, on other windows.
The feedback on this ranges from thrilled to appalled — “choose your character”. Bad gut feeling? Then go with a different option, like a Styrofoam or acrylic panel. Nobody has to saw into their window.
Measure more than once, assess your own situation honestly, and when in doubt, do not cut.
The first version was built unapologetically for my window
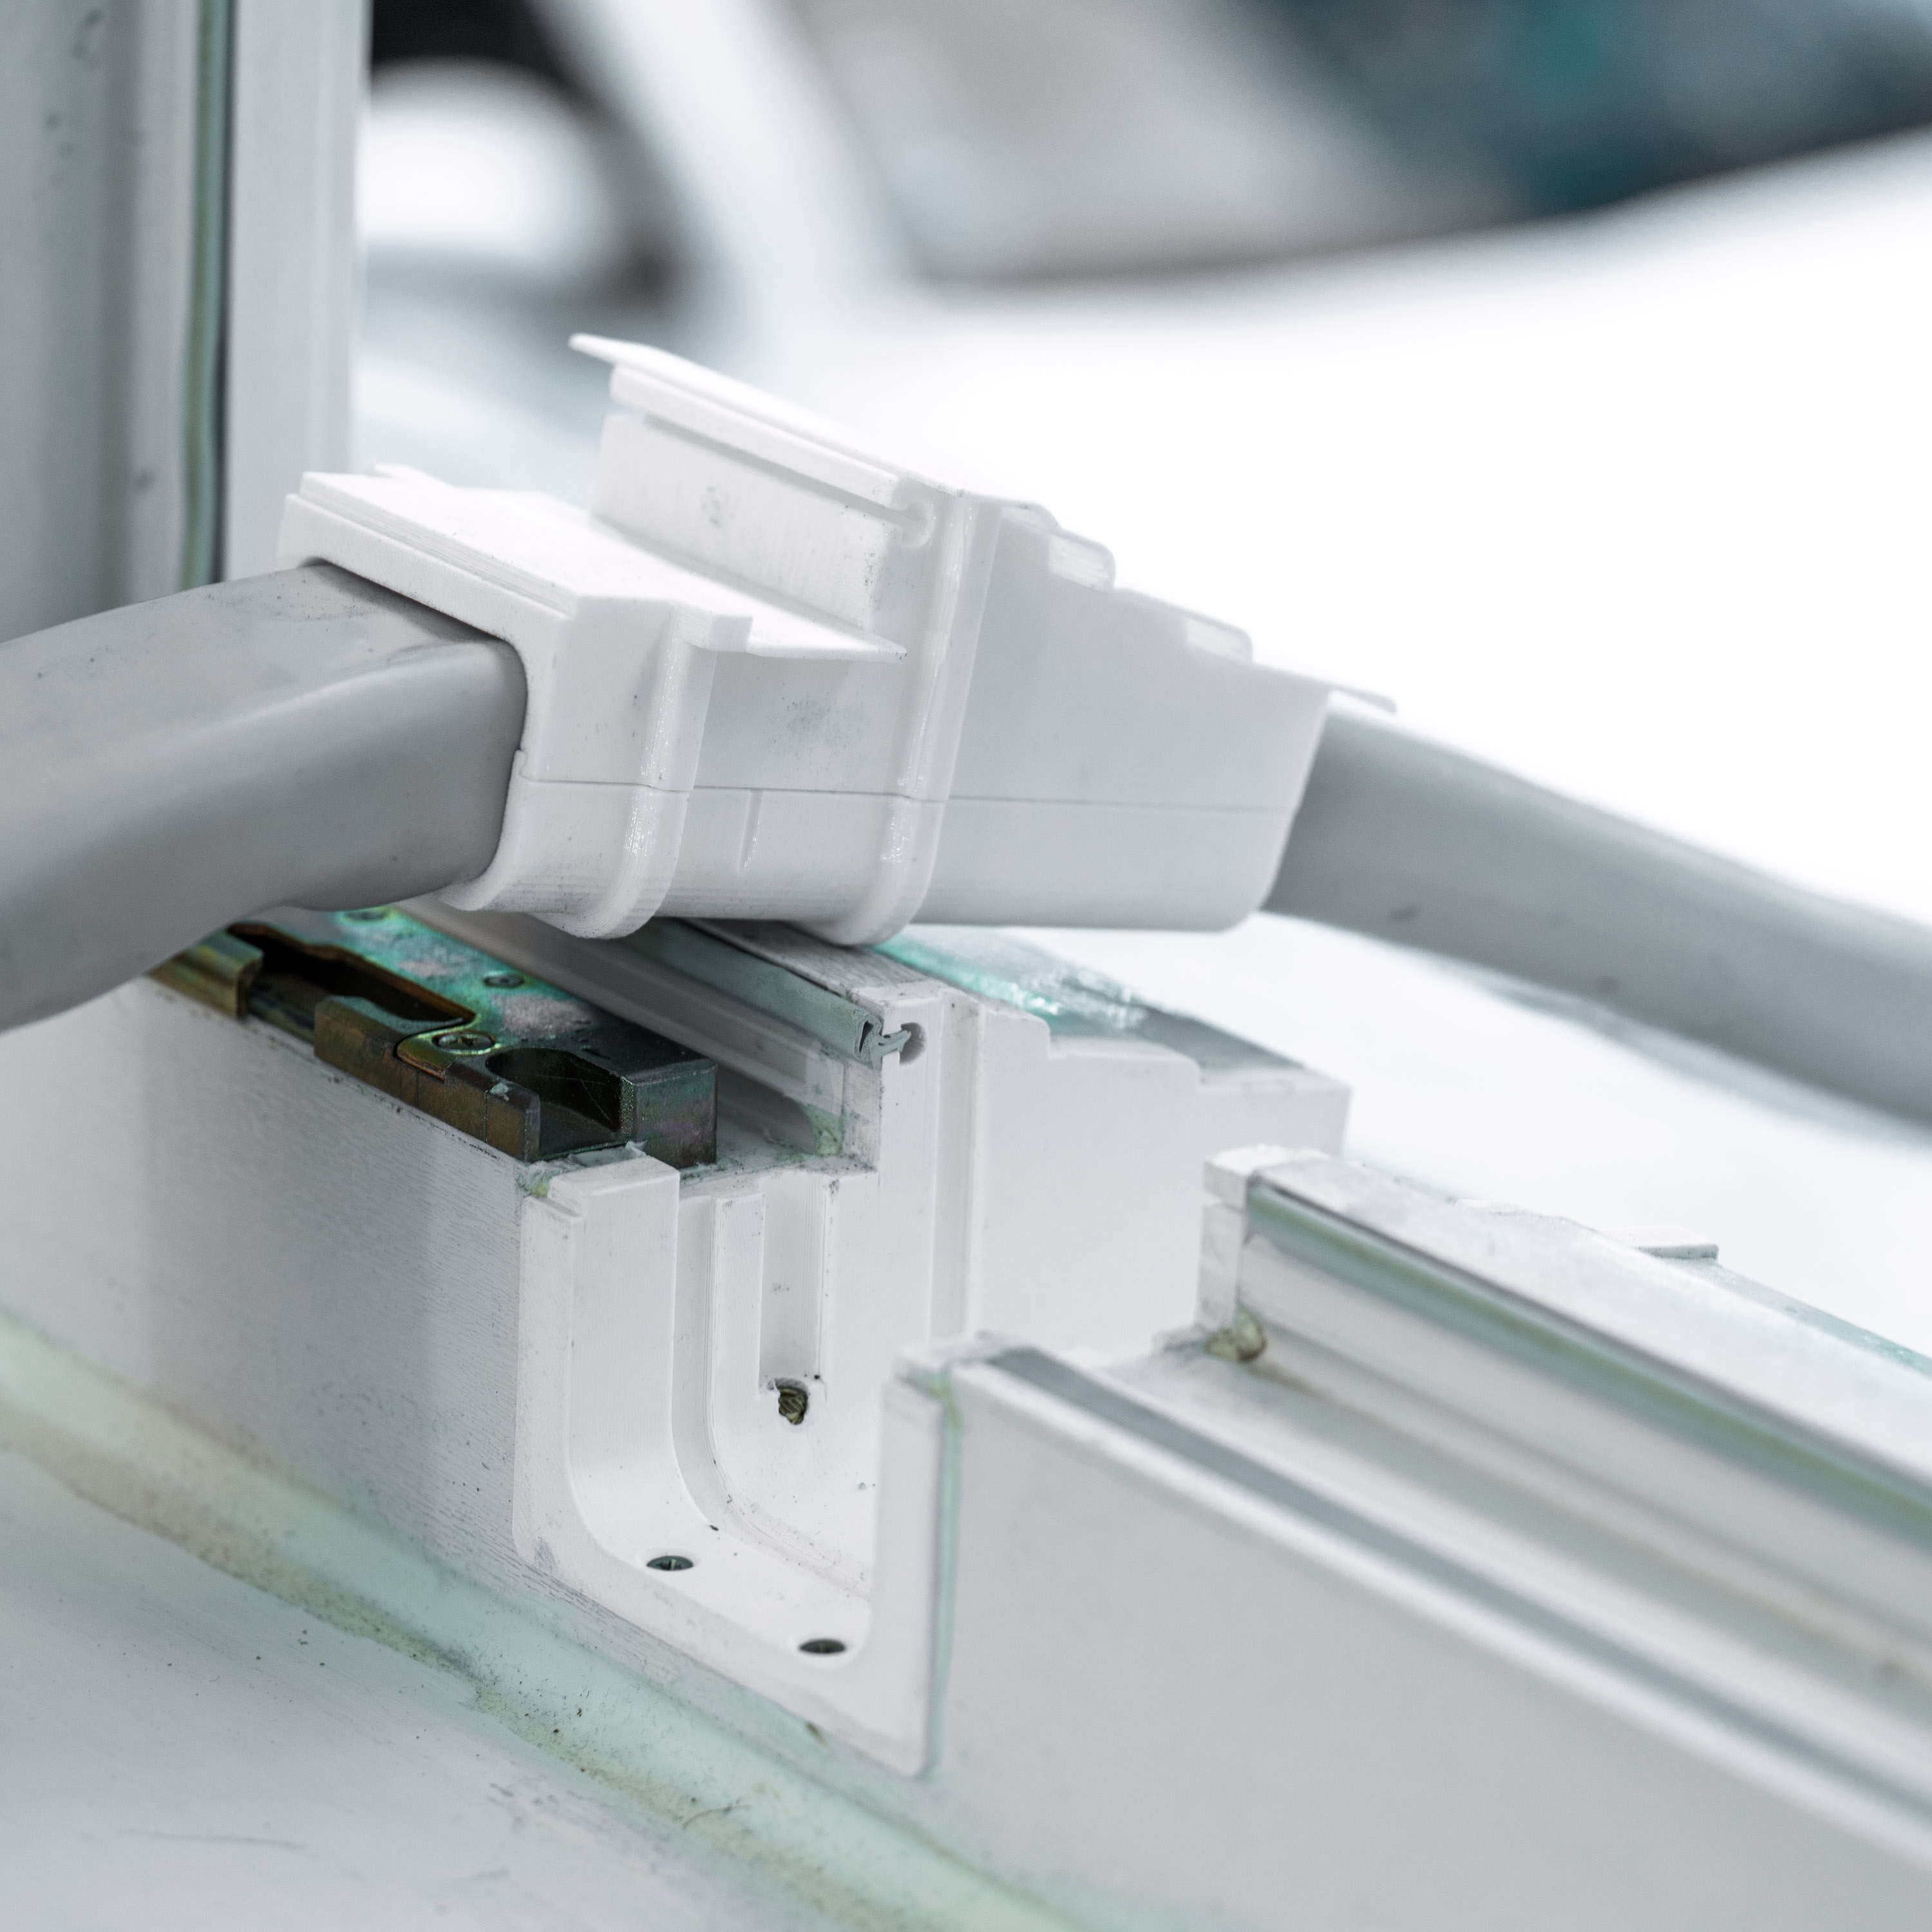
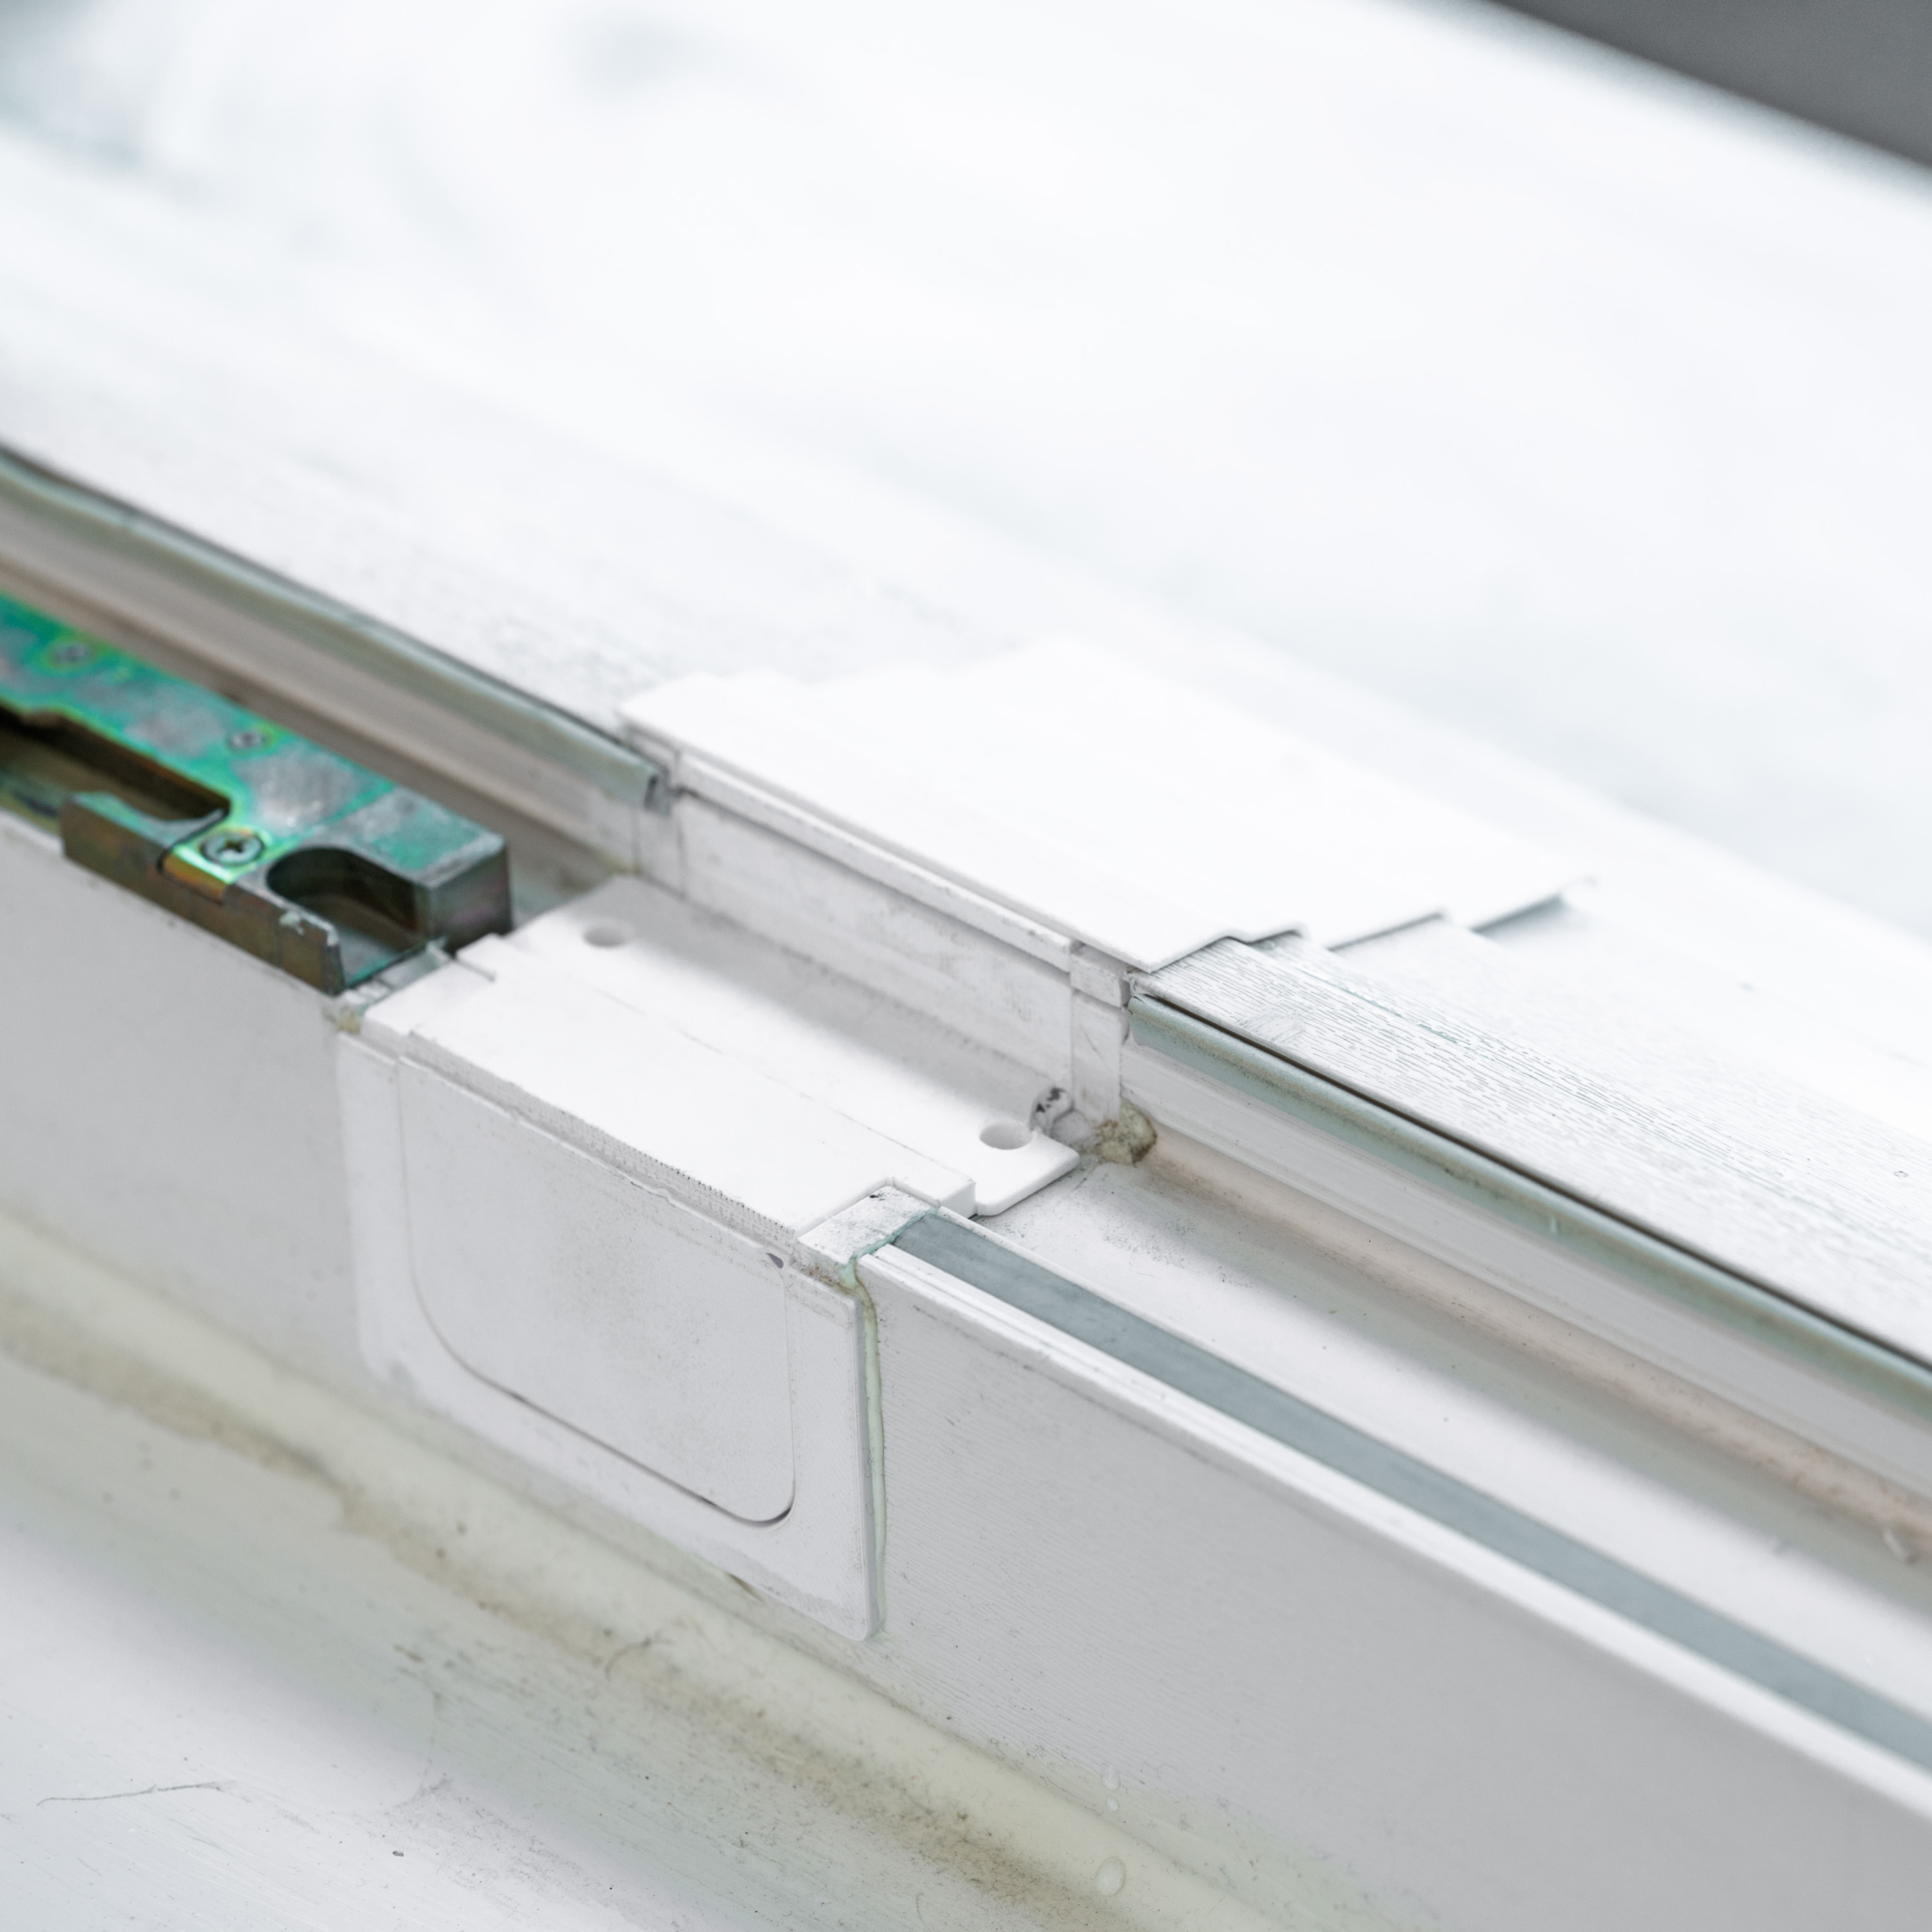
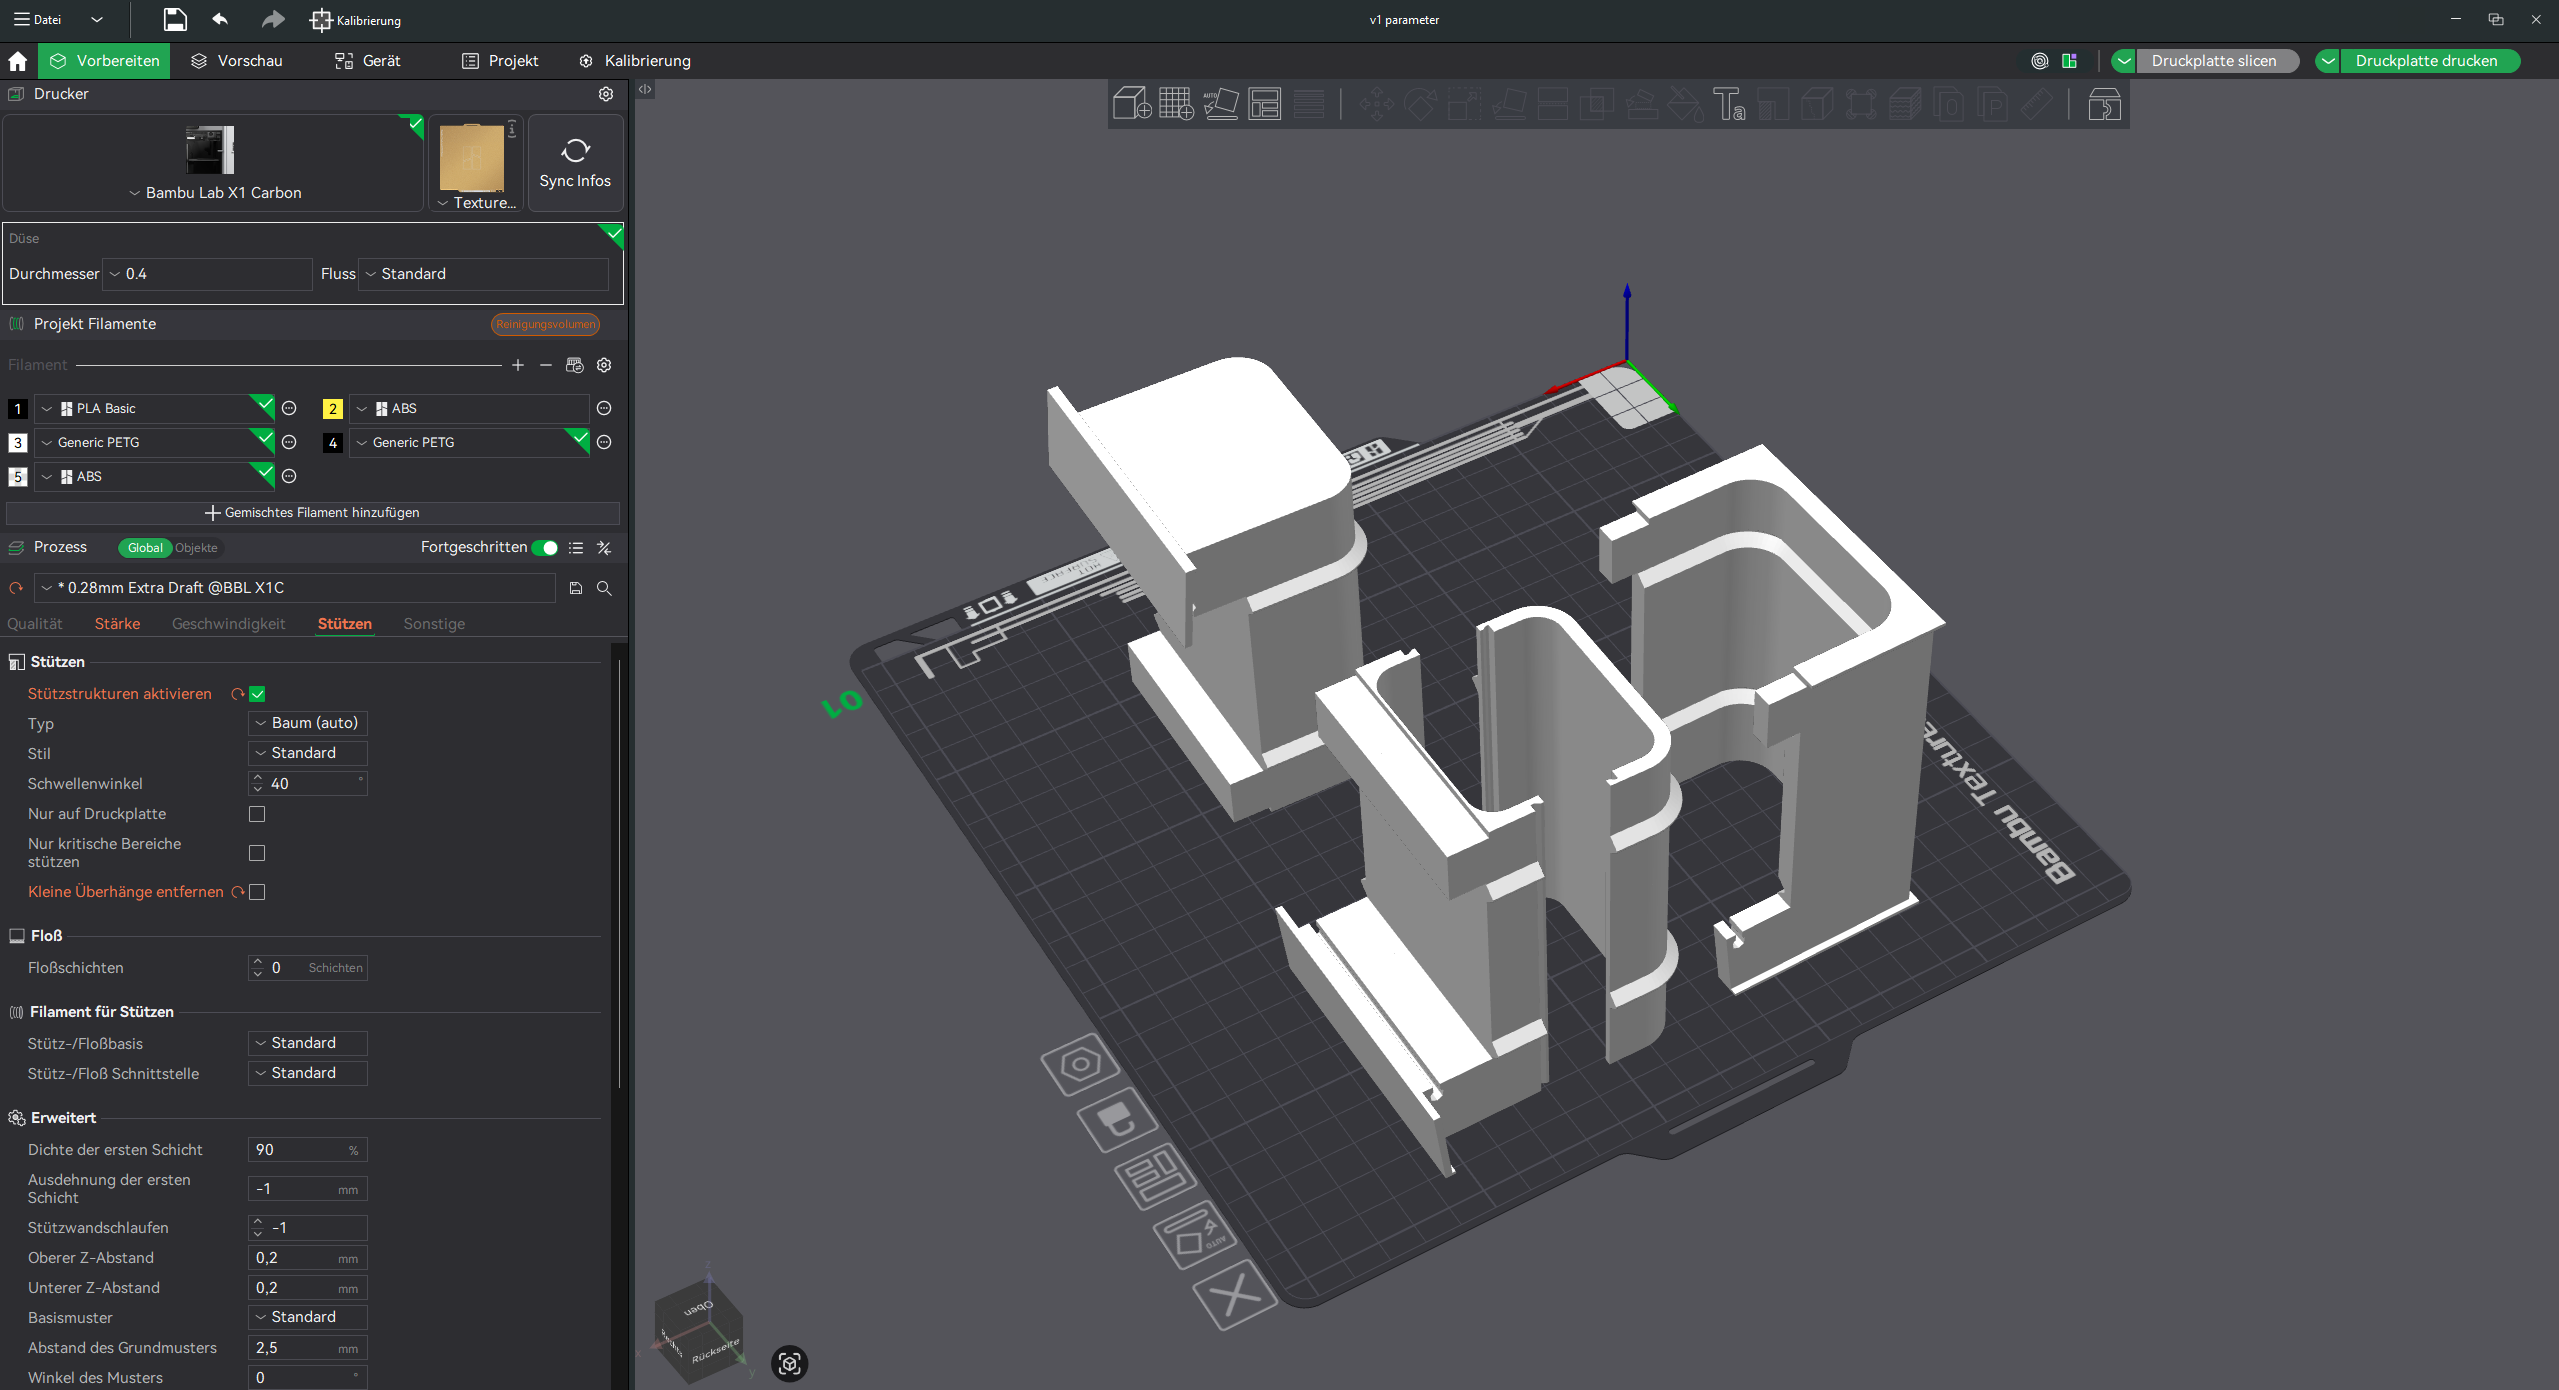
The first model was perfectly adapted to my specific window — a heritage-approved plastic window with a fly screen and a transition edge to the windowsill that I cut into. Very specialized, barely transferable to other windows. The system ended up with three parts: a fixed frame insert that stays in the frame, a pass-through insert for the hose bundle during summer, and a blind insert for winter, when the AC is gone and the opening needs to be closed again.
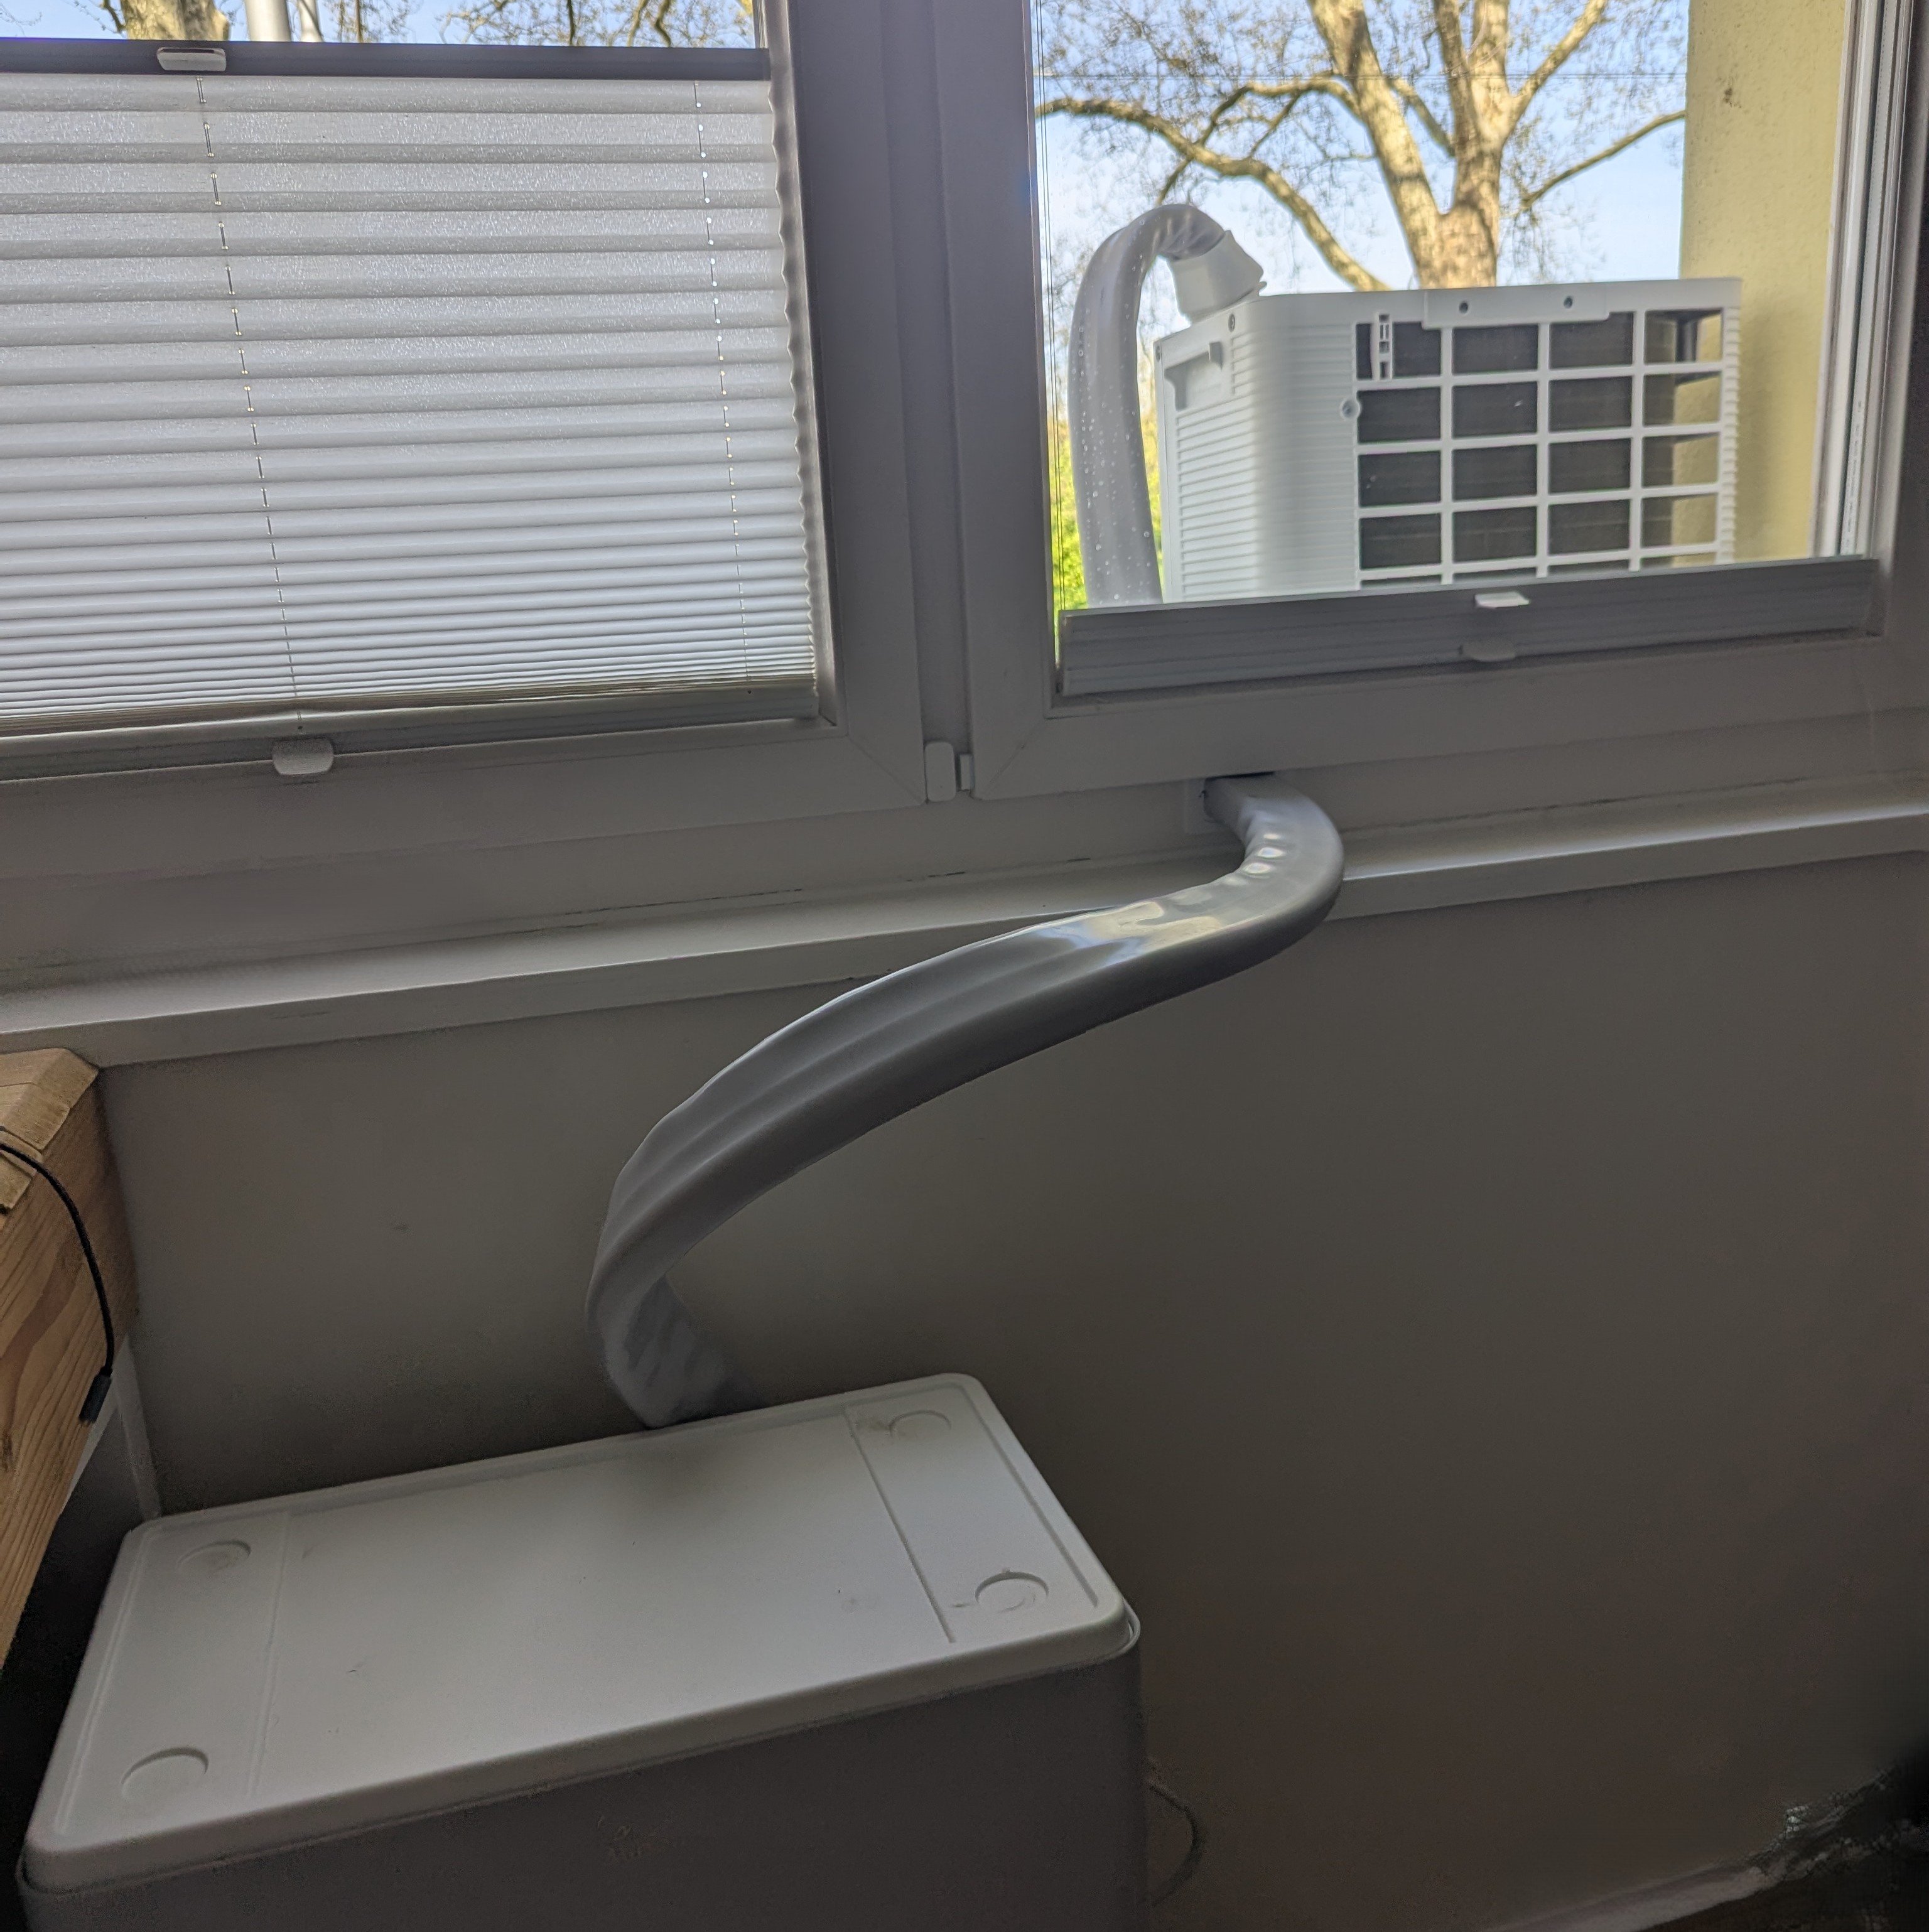
In daily use that was exactly what I had been looking for. The AC stays put all summer. In autumn the blind insert goes back in, and the topic is basically parked for a few months. No daily setup and teardown.
What held up after roughly two years of real use
The most important thing first: on my window, the setup still works well. In exactly the uneventful way you want from a part like this. The adapter sits, the window closes normally, and there is no noticeable draft — the hose bundle is slim enough that the insert still seals reasonably well.
What I had not expected: how much this changes the overall feel of using the PortaSplit. The AC starts to behave more like a semi-permanent installation. Switch it on in the morning, off in the evening. No improvisation anymore.
One caveat I have to name: whether this works equally well on other window profiles, I genuinely do not know. My frame is a heritage-approved plastic window with a very specific profile. With different materials, different profiles, different installation situations, the result might look quite different. The model was never meant as a universal solution — the first version especially. That very caveat was ultimately the reason the one fixed model turned into a generator — and why you can now even feed in your own profile instead of having to make do with mine. More on that later.
Why this turned into an app
After publishing the first model, requests for the construction file came in fairly quickly. I shared it — it is still up on MakerWorld — but honestly that first file is a bit of a mess. And a CadQuery file is not a useful starting point for someone who just wants to print a window adapter anyway: too window-specific, too much ramp-up required.
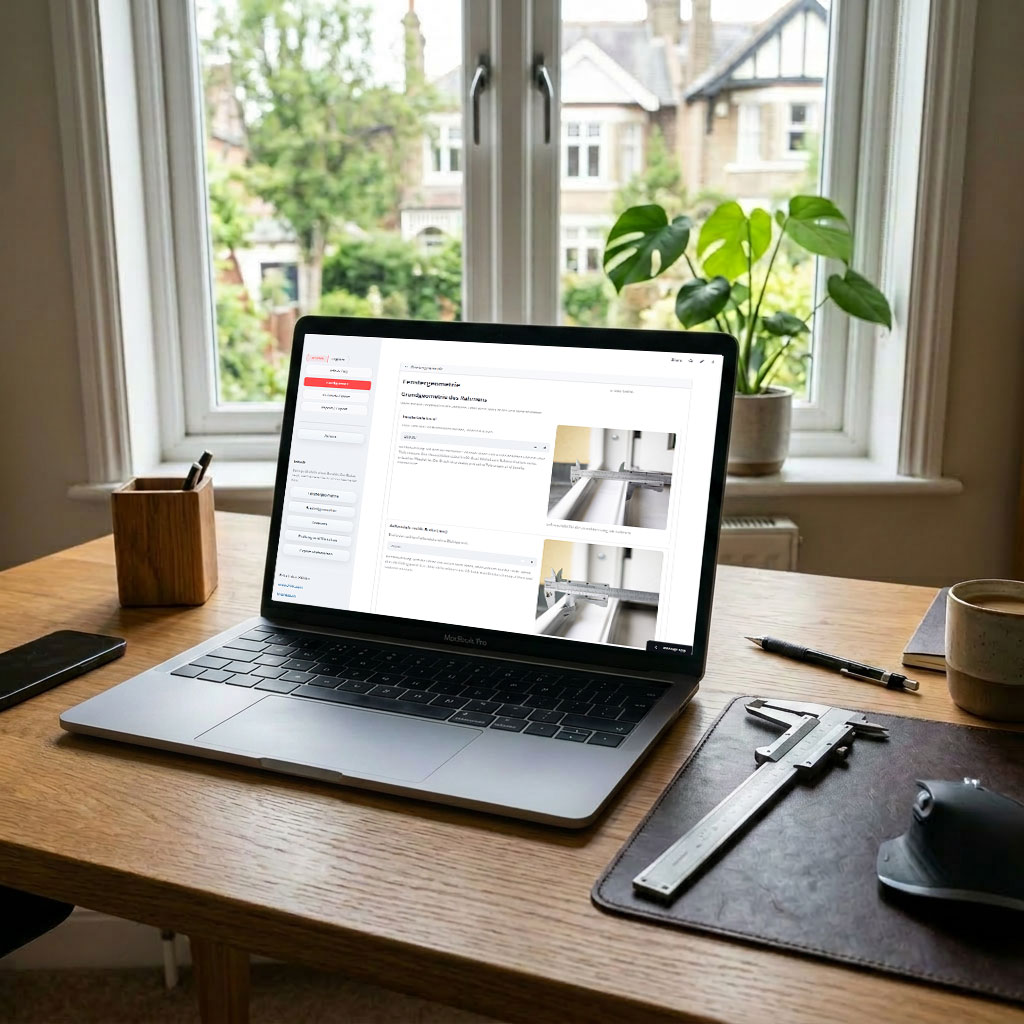
The real problem was: there was interest, but my model only fit my window. For everyone else it was inspiration at best. The next logical step was therefore not another fixed model but a generator. Measure the window, enter the values, generate matching parts — the annoying part should no longer be CAD work but getting the measurements right.
On top of that, I just wanted a vibe coding project. I already knew from first-hand experience what a generator like this needed — I had just built the problem, just brutally customized for my own window. So I put together the stack — Streamlit, Python, CadQuery — with OpenAI Codex.
What the generator currently does
The app is deliberately focused on this one problem: deriving a printable window pass-through for the PortaSplit hose bundle from your own measurements. The workflow is direct:
- Record the relevant window dimensions in a structured way.
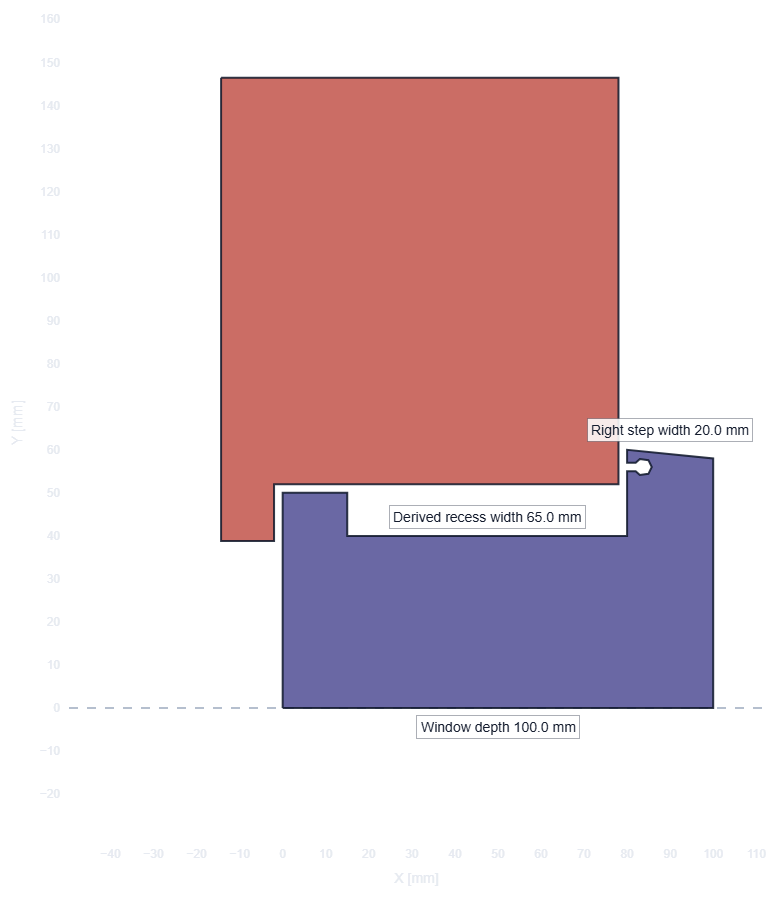
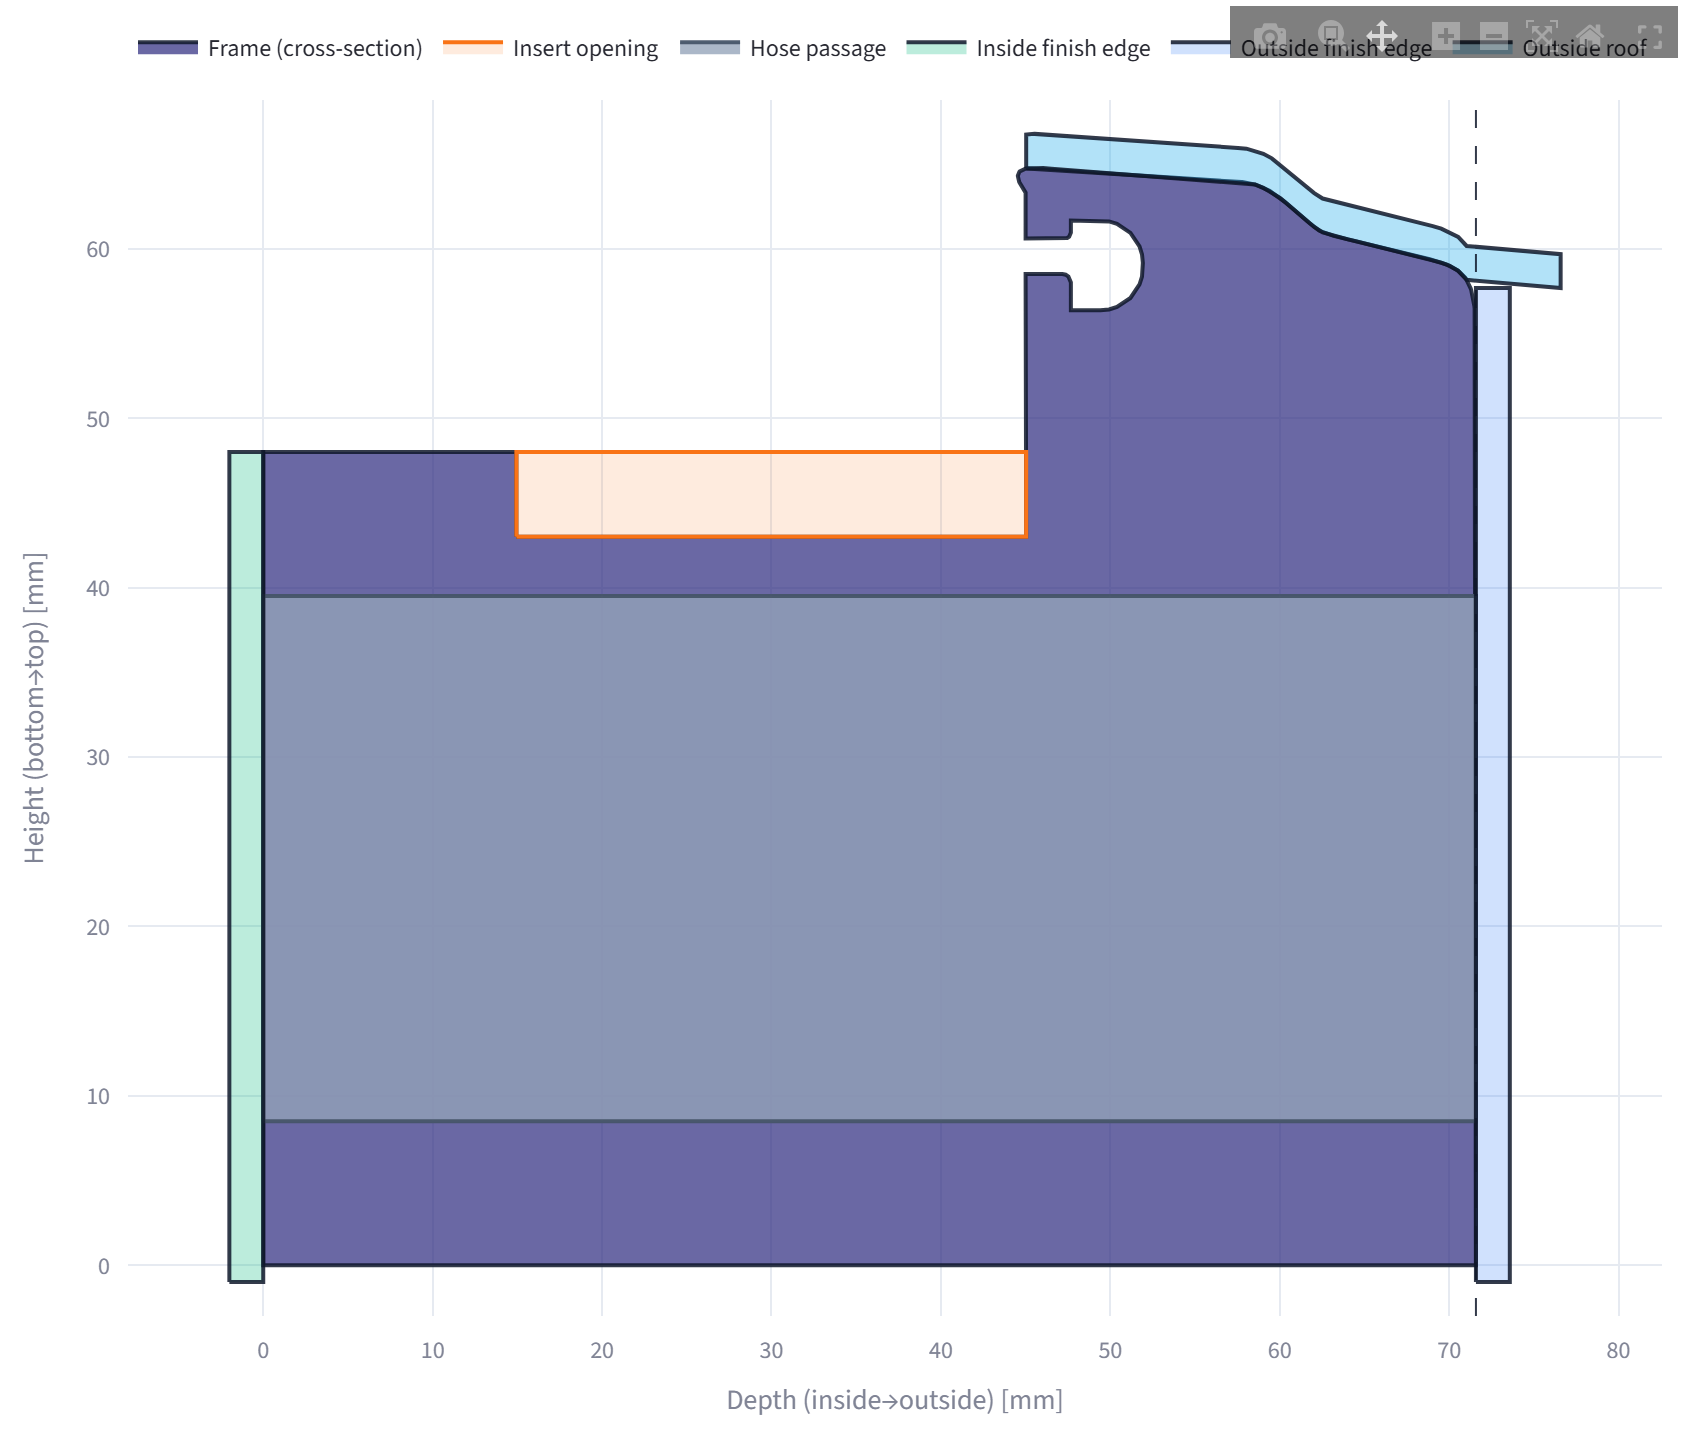
- Pre-visualize the geometry as a 2D cross-section — and check whether the numbers actually make sense.
- Generate 3D print files and documentation.
That 2D cross-section matters almost more than the forms themselves. A transposed digit often looks harmless in an input field. In the profile view, you notice much faster when the geometry suddenly stops making sense.
By now it does not stop at just looking. Behind the preview runs a small set of named checks — whether the adapter body breaks out of the profile at the bottom, whether the hose bundle stays inside the profile, whether the frame would be sawn all the way through on paper, whether the top cover still fits under the frame edge. If a combination does not work out geometrically, the STL export is blocked instead of quietly producing something broken. That is the unspectacular but important kind of feature: it prevents exactly the prints you would otherwise only recognize as failures after hours of print time.
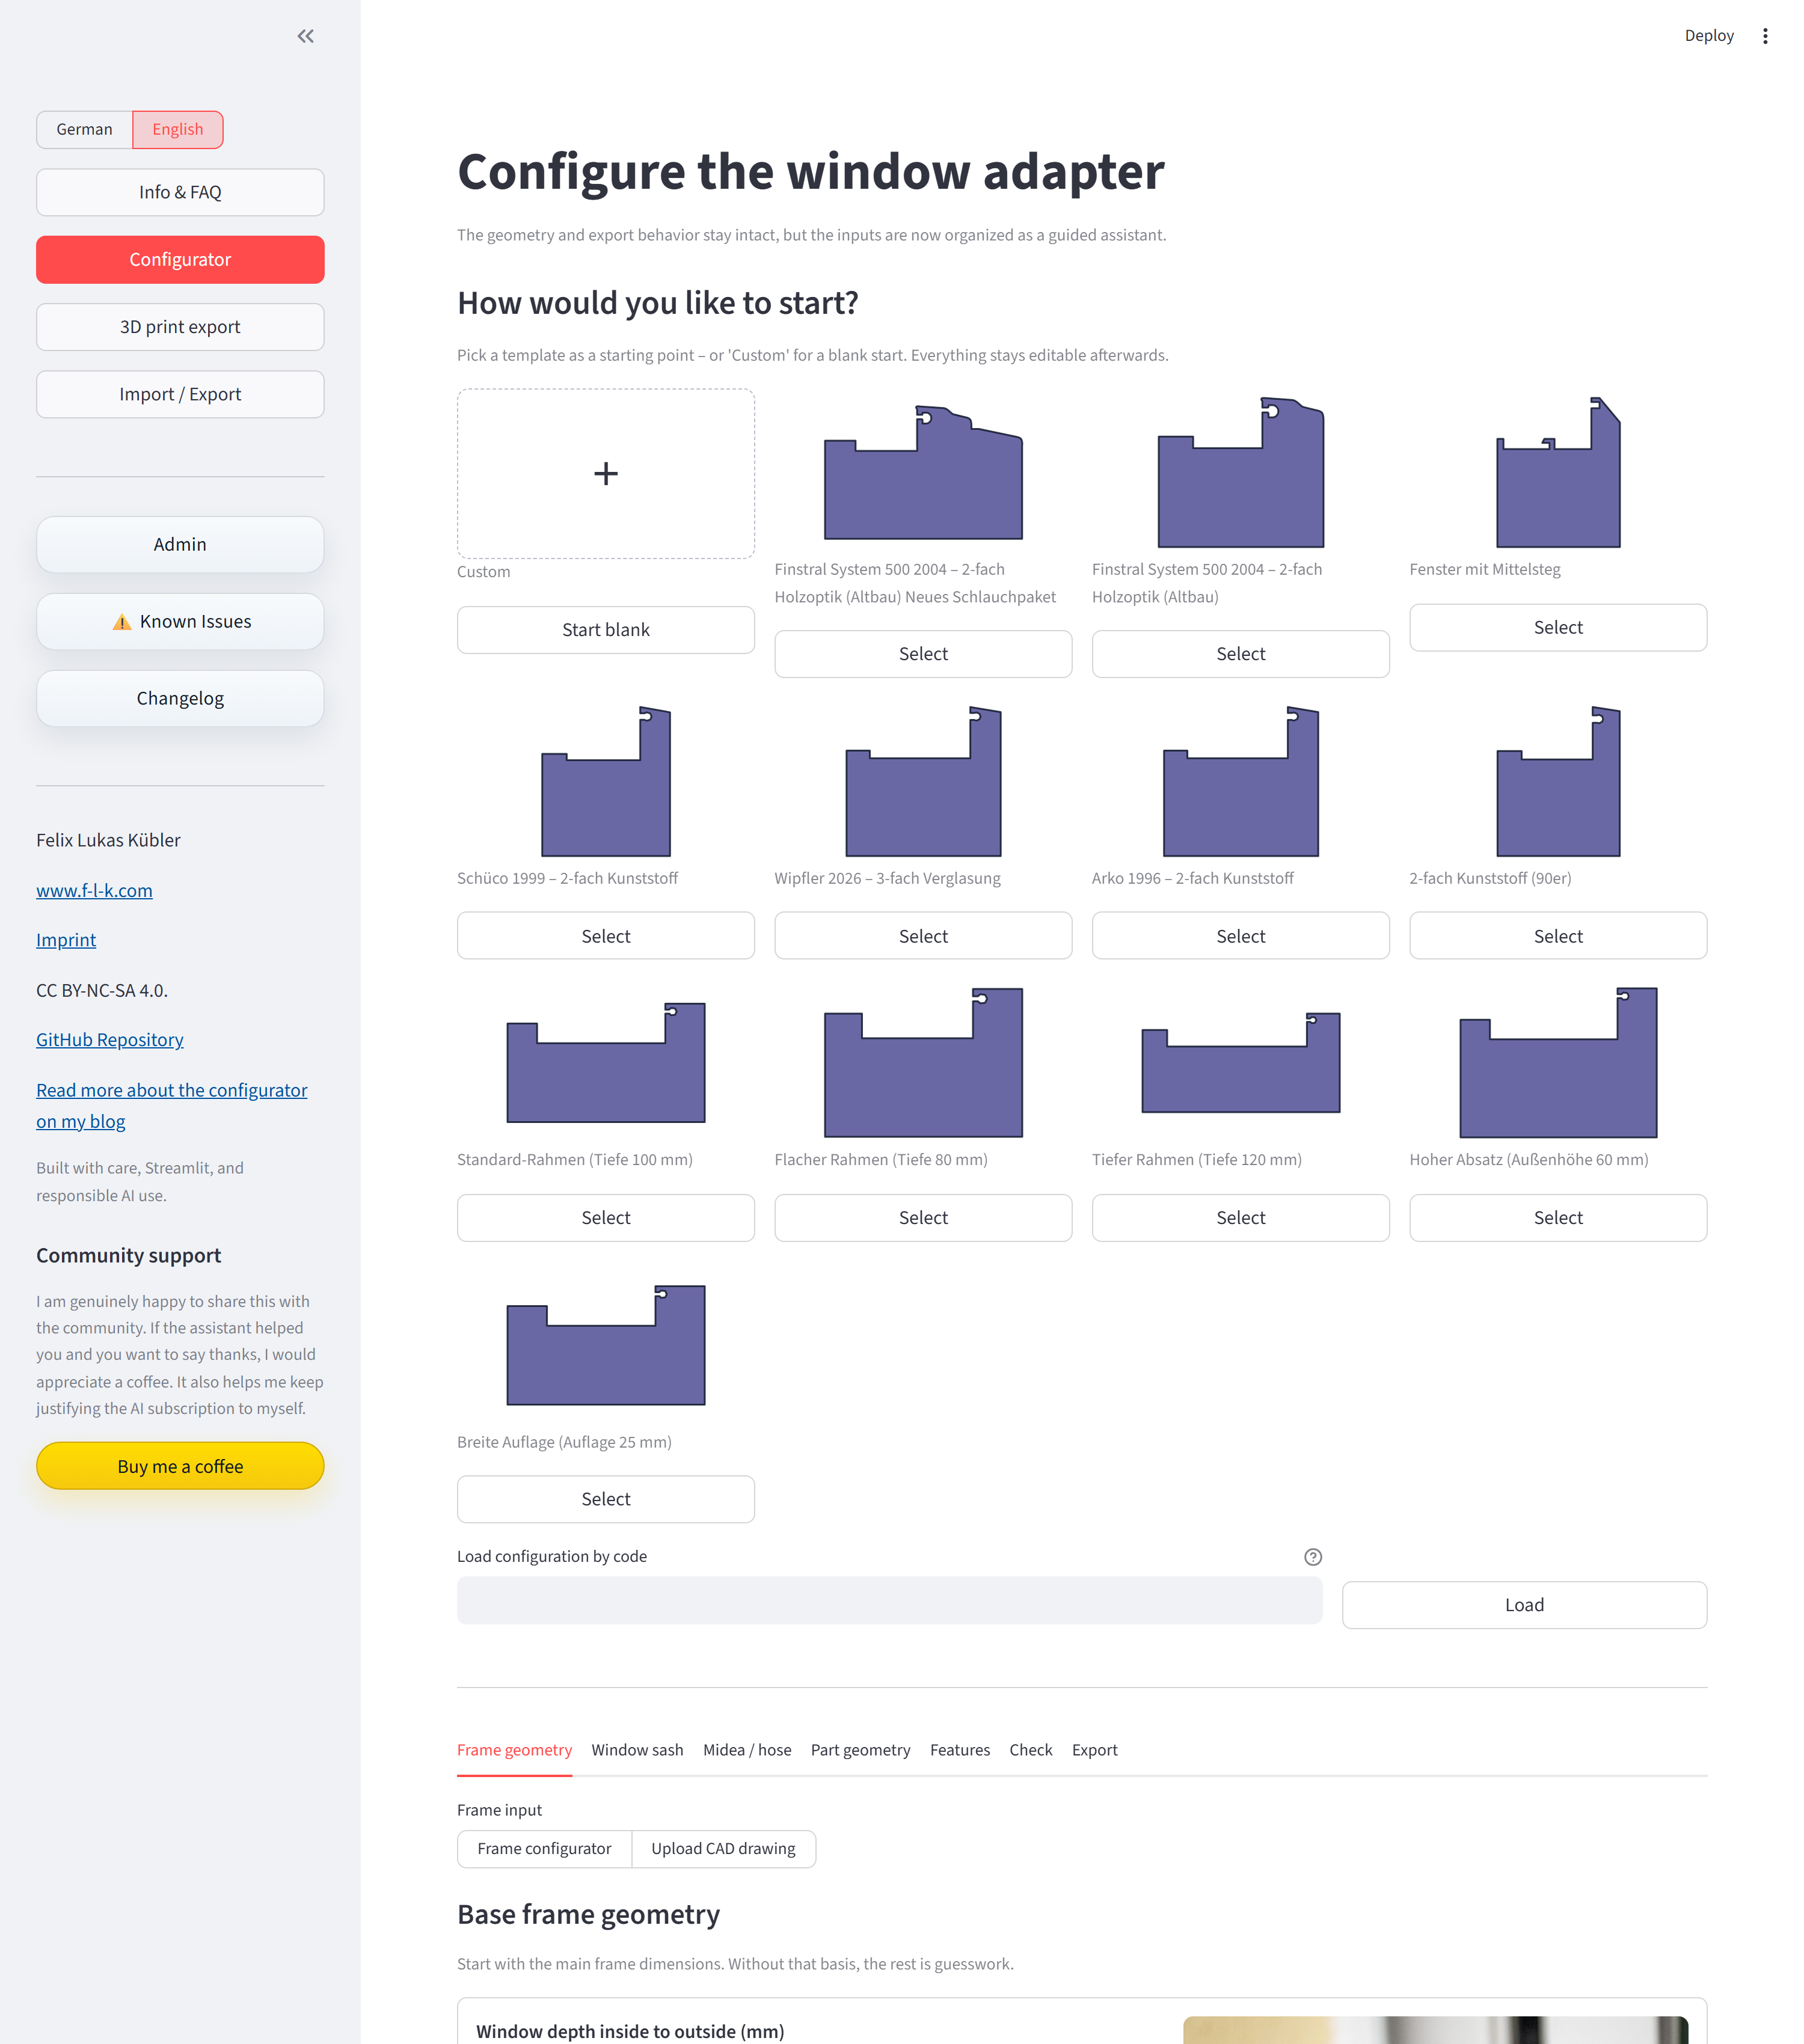
And you no longer start from scratch. At the beginning there is a small selection of profile templates; you grab the closest one and only adjust it — or start “empty” if you want to enter everything yourself.
The exports currently include:
- separate STL files for all parts
- a ZIP with all STLs (including a README with the recovery key)
- a JSON file with the full configuration
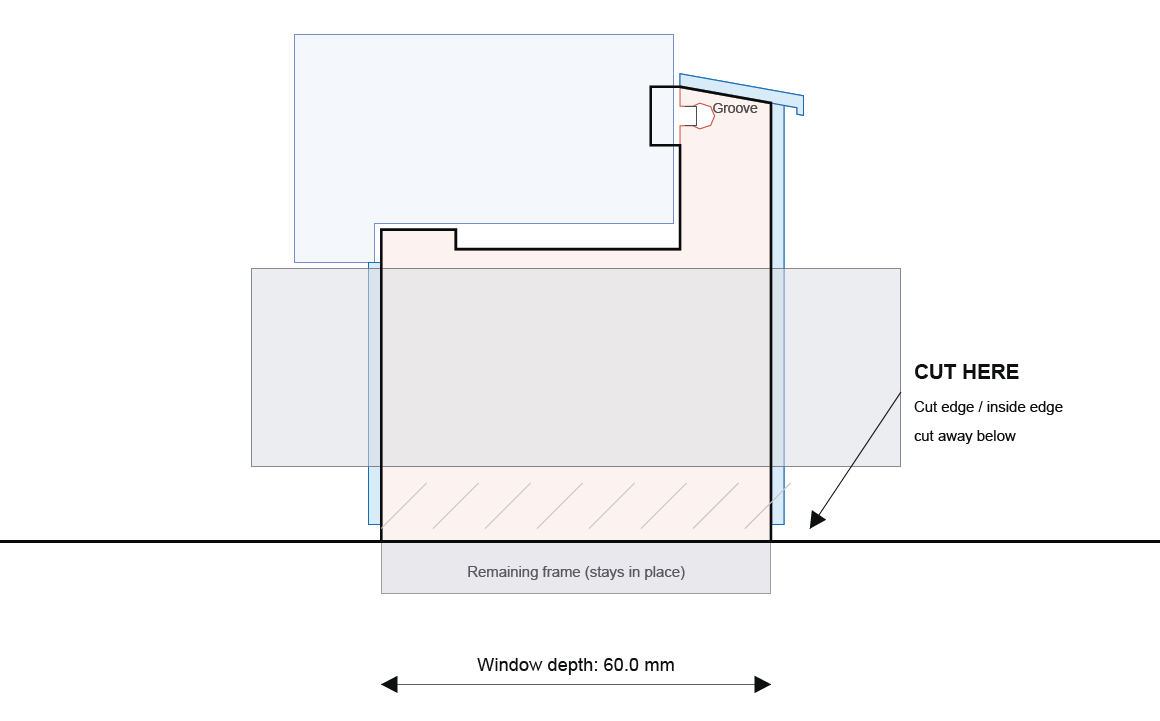
- a PDF that is more than a measurement sheet: page 1 is a 1:1 cutting template with a continuous “CUT HERE” line you can lay directly onto the window; page 2 summarizes the configuration and dimensions for later reference (including the recovery key); page 3 covers the workflow, safety notes, license, and sources
I especially like the cutting template on page 1, because it helps at exactly the most uncomfortable step: the actual sawing. Instead of transferring dimensions from the screen onto the window, you print the template at full size, lay it in place, and have the cut line right where it belongs.
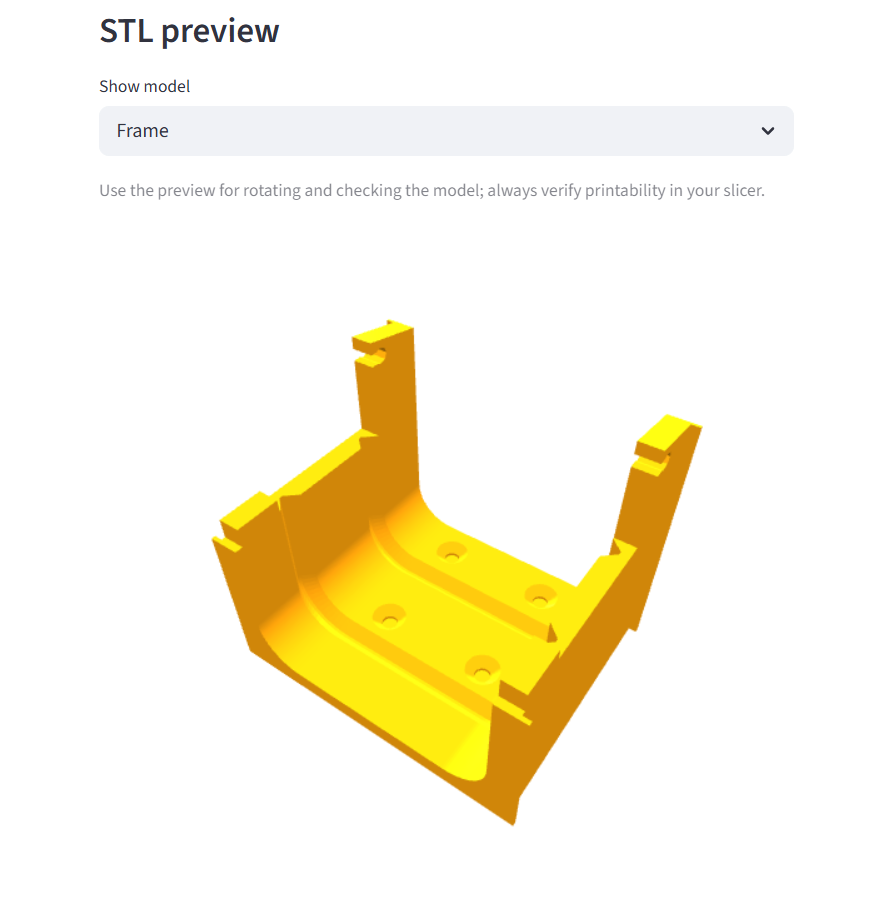
Before downloading, the export step shows an interactive 3D preview of the parts. You can rotate the part and look at it from all sides, not just stare at a still image. Originally a developer feature I left in — but it is nice to look at, and you immediately see whether all the configured options actually ended up on the parts.
Two newer features that mattered to me personally: First, there is now a recovery key. If a part needs reprinting — wear, a small change, just needing it again — you can load the complete configuration back directly without re-measuring everything. Second, configurations can now be submitted for the community. If you have a window measurement that might be useful to others, you can submit it directly from within the app.
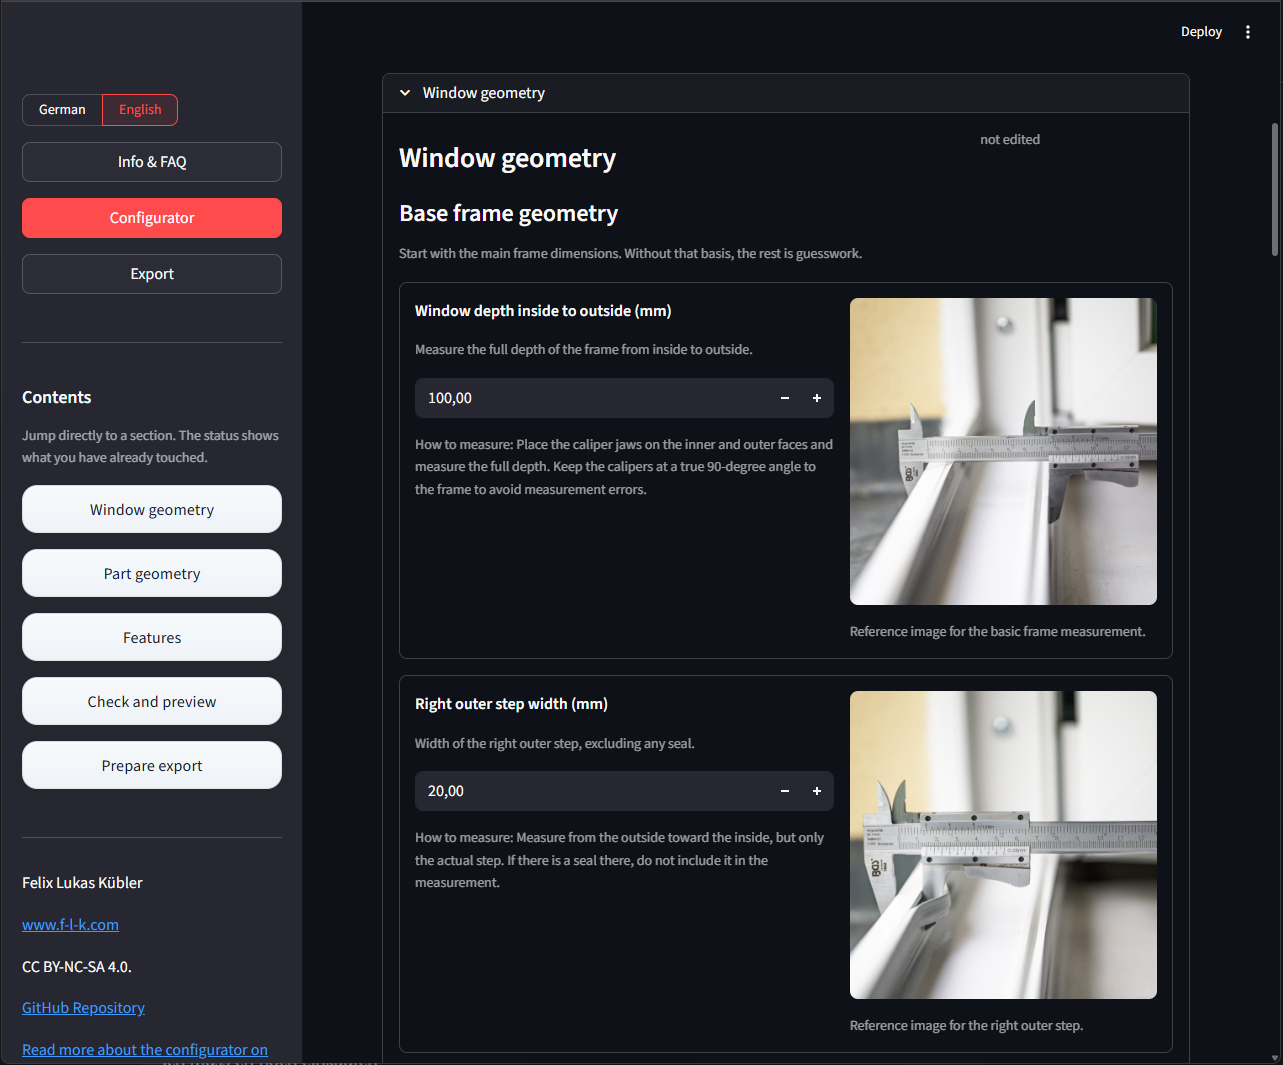
One thing that came straight out of the feedback: the PortaSplit hose bundle apparently is not equally thick across all model years. My own setup runs with a slimmer bundle, others have reported thicker ones — older units sit at around 56 × 31 mm, while a 2026 unit was reported at 60 × 32 mm. So you pick the matching variant in the configurator (or enter your own measurements), and the frame width adjusts automatically. It is no longer hard-wired to a single value but follows the measured hose width. That is exactly the kind of detail I had underestimated: what fits as a matter of course on my unit is suddenly too tight on a different model year.
Two ways in: measure the window — or upload the real contour
The sore point at the start was always the same: I could pour window depth, steps, and sash into input fields — but a window profile is rarely as well-behaved as a form pretends. It has roundings, small offsets, a sealing groove that is square nowhere. That was exactly where my own caveat sat: on my window it fits, but “type in a few dimensions” only describes other people’s profiles approximately.
That is why there are now two input paths.
The guided path is the parametric one: you type in the measured values and the app derives a simplified profile from them. Fast, good enough for many simple profiles, and you need no CAD.
The second path is the more honest one for complicated profiles: you upload the cross-section of your window frame as a DXF — drawn in Fusion, FreeCAD, LibreCAD, whatever. The contour is then not rebuilt or approximated but becomes the frame shape 1:1, including roundings and offsets. You only enter the functional values below it — hose bundle, sash drop, tolerances, the optional features.
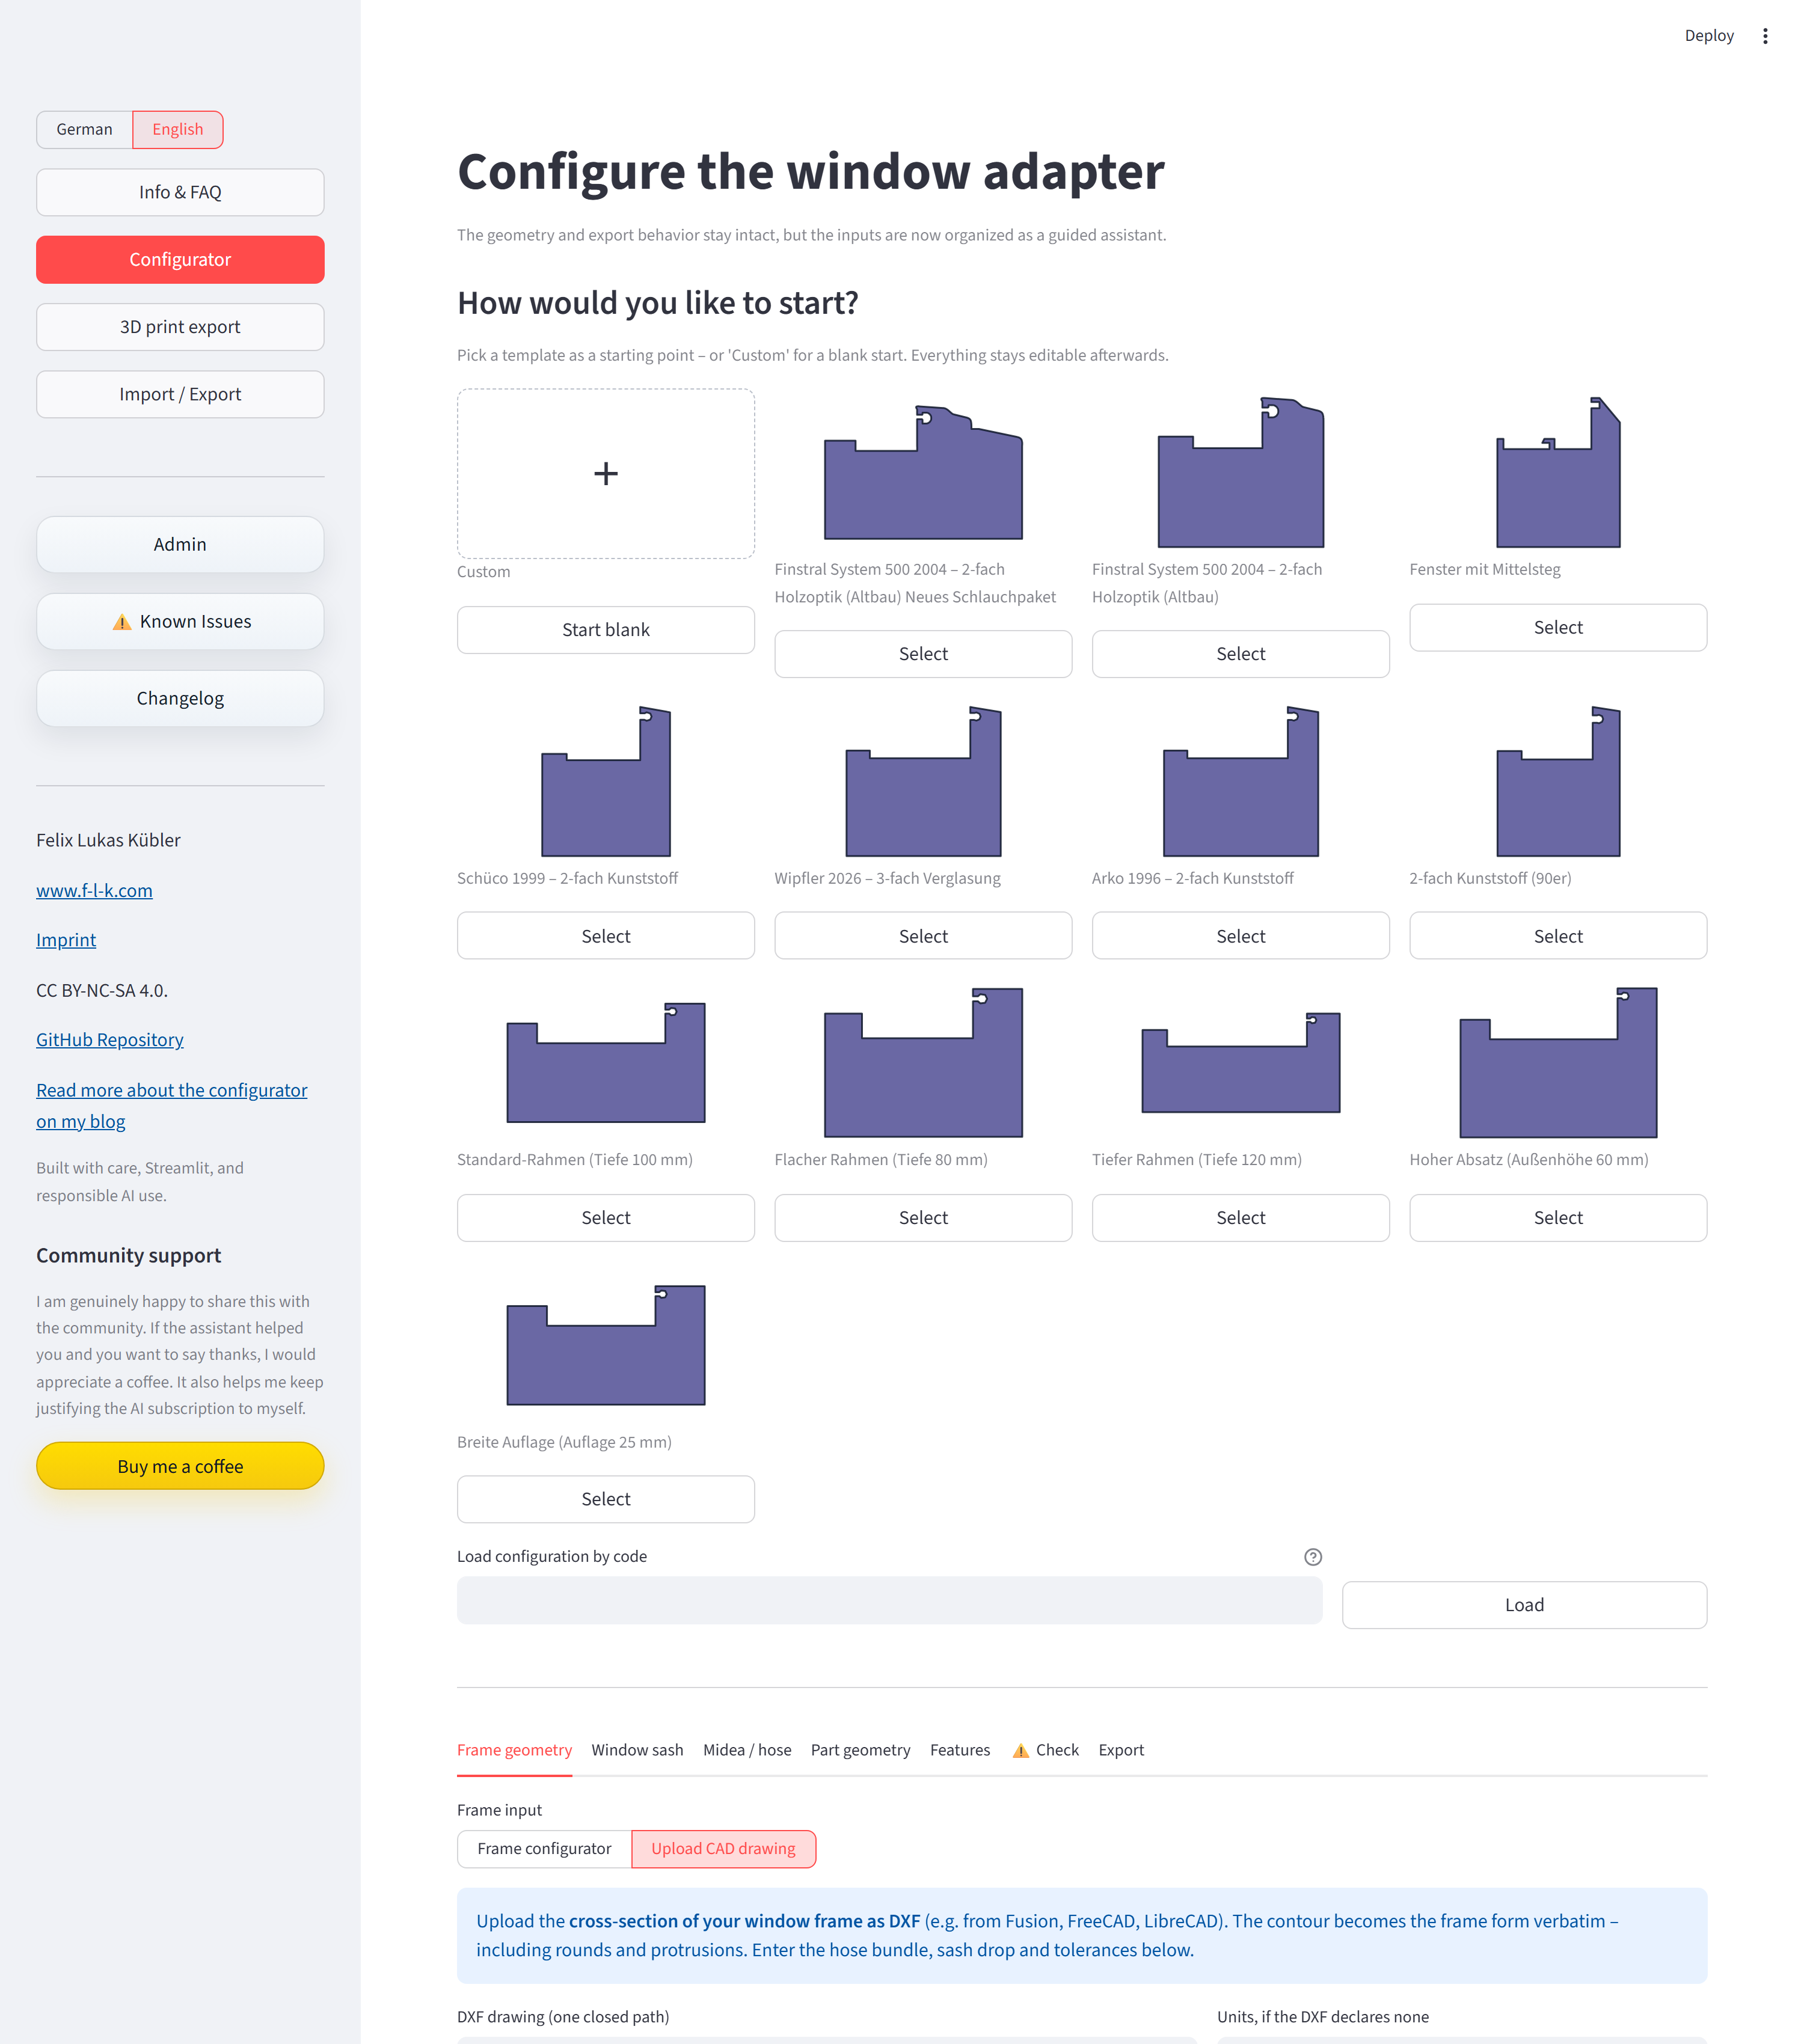
That shifts the app’s ambition noticeably. Before, it was a generator for “windows roughly similar to mine”. With the DXF path it is closer to “your window — if you can draw its contour cleanly”. This is explicitly not a universal promise: responsibility for measuring and drawing correctly stays with you, and the caveats from the disclaimer still apply unchanged. But it takes a lot of the sting out of the old “only fits my profile”.
The nice part is that the 2D preview works identically in both cases. Whether the shape comes from numbers or from a DXF file — pass-through zone, parting plane, finishing edges, and outer roof are overlaid the same way. So even with an uploaded profile you immediately see whether the geometry is coherent before anything is exported.
A small bit of honesty on the side: configurations from a DXF contour can be saved and reloaded, but not squeezed into the short recovery key — there is too much geometry in the file for that. So they go through the catalog rather than the code.
Technically it is half web app, half CAD tool
The interface runs in Streamlit because that was the pragmatic way to build a guided configurator for this. I did not want to turn it into a frontend project before it was even clear whether the generator would actually be useful for other windows in practice.
Underneath sits CadQuery. The parts are not made by stretching a prepared STL — they are rebuilt from the input parameters. That was the whole point. Once window profiles start differing, simple scaling stops being a serious answer.
The DXF path was the real test for the architecture. The drawings are read in with ezdxf; from lines, arcs, and splines a closed cross-section is built. And that cross-section has to dock at exactly the same point as a parametrically generated profile — the same 2D preview, the same feature overlays, the same geometry pipeline down to the STL. To make that work cleanly, UI, validation, preview, and geometry are deliberately built in separate layers instead of dumping everything into one app file. Sounds like overkill for a maker project, but it paid off at exactly the moment the uploaded shape became the second, equally ranked input.
The project was also very clearly built with vibe coding — iteratively built, rebuilt, tested, and thrown out again with OpenAI Codex. That worked surprisingly well for this mix of UI, geometry, and export logic. The direction, though, did not come from a prompt window. It came from a real window, a real AC unit, and some very specific constraints.
Buy it ready-made instead of printing it yourself
Not everyone has a 3D printer sitting around — or the patience to fight through printing and post-processing. So the adapter is now also available ready-made, manufactured and sold by SureParts:
One thing you will not be spared even when buying: the measuring. The adapter has to fit your window profile, and that comes down to your measurements. Especially if you cannot print yourself, it is all the more worth printing the cutting template from the generator on a plain paper printer first, holding it up to the window, and checking whether you mismeasured — before anything is sawn or ordered.
For context, because I would rather be open about it: these are not affiliate links — I earn nothing from you clicking or buying there. Instead, SureParts pays me a license fee for the commercial distribution. Paul from SureParts simply asked nicely, and that arrangement helps fund the test runs — and is what makes it justifiable for me to put money into test prints and tools like Claude Code in the first place.
For the maker community, nothing changes: the model, the generator, and the source code stay free for personal use — print and adapt as much as you like, and sure, print one for an enthusiastic neighbor too. Only commercial use within the European Economic Area sits with SureParts. Anyone printing just for themselves is not affected.
Frequently asked questions
How did you actually cut the frame?
For the vertical cuts I used a hand metal saw, for the horizontal ones a multitool with a saw blade. The multitool was the more important tool here because the horizontal cut sits right at the frame stop, where a regular saw barely has room to work.
One thing worth keeping in mind: work slowly and measure more than once. The cutout does not have to look pretty — it disappears under the adapter — but it has to be in the right place.
Did cutting into the frame cause any problems?
On my window, not so far. The frame was not cut all the way through, just fitted with a cutout large enough for the hose bundle. I also screwed the insert in place rather than relying purely on friction.
That does not mean it is unproblematic on other windows. Frame profiles vary considerably. Do not transfer this approach blindly.
Does cold air come in during winter?
For me, no noticeable draft — in winter the blind insert goes in and the opening is closed again. My building is an older apartment block; airtightness is not going to be determined by the adapter alone in any case.
Does this now fit windows other than yours?
More than it used to. For simple, rectangular profiles the parametric path is often enough — enter the dimensions, done. For anything with real roundings and offsets you can upload your cross-section as a DXF, and the app uses that contour directly as the frame shape instead of approximating it. On top of that, things like the hose width and the frame width now adapt to your own measurements.
That is still not a guarantee. You have to measure and draw cleanly, and the usual caveats from the disclaimer apply unchanged. But the old line “only fits my window” is no longer true.
Why not just get a proper split AC?
Mainly cost and installation effort. A fixed split unit would be the cleaner technical solution, but in my situation it would probably have meant longer refrigerant lines, cable trunking, and considerably more disruption to the apartment. The PortaSplit was a good compromise: much more efficient than a classic portable AC with an exhaust hose, but less invasive than a fixed installation.
Why not just lay the hose bundle through an open window?
I wanted a solution that stays in place all summer. The daily routine of opening the window, feeding the bundle through, and improvising some kind of seal was already annoying after a few days. And a permanently open window was out of the question for noise, cooling efficiency, and general peace of mind.
Why not use a Styrofoam or acrylic panel in the window?
That can absolutely work — especially in quieter locations, upper floors, or when you do not want to touch the window frame at all. For my street-facing window I did not want a solution that looks from outside like a permanently blocked-up window. That mattered to me.
Would you build it again?
Yes. After two summers the setup still works exactly as I had hoped. No daily setup and teardown, the window closes normally, and the PortaSplit feels more like a semi-permanent installation than a portable AC that demands a new workaround every summer.
Started as a solution for exactly one window
This started as a very specific solution for a very specific problem: my window, my PortaSplit. The first model was so specialized that it was barely usable by anyone else directly. And yet, after publishing, there were requests, downloads, Reddit discussions. I had not expected that.
Now, after two summers with the pass-through and a generator that actually works: it feels good. Not as a finished product — it is not that — but as something that is genuinely useful and not just for exactly my window.
If you try it out: I am happy to hear back. Bugs, feature requests, reports from other installation situations — all welcome as issues in the GitHub repository. I can test a lot at my desk, but not every window.